A few Fun Facts about Azalea Bonsai.
What about the Flowers?
When is my BEST time for pruning?
What about Cuttings?
Repot: Spring or Summer?
When do I do my Wiring?
What are the issues with pests?
God Bless & Happy Bonsaiing
Xavier
The first and last time I tried doing this was back in early winter, 2019. It went very well and I lovingly kept it protected in the greenhouse over winter – occasionally going out to admire my technical prowess! But, in the early-spring enthusiasm of 2020 I had what I could only call, a ‘brain fart’! The threaded whip was starting to ‘green up’ and looked like it was going to be a big success. So, to help it along, I decided to remove all of the buds. I know, everyone right now is smacking there foreheads in disbelief.
To this day, I still cannot understand what was going through my mind. Understandably, the graft failed and all I could do was admire the speed with which I had undone all my expert work!
Can I do this to ALL my Bonsai?
If you have a deciduous tree and the buds have not started to swell, then yes, you can try a thread graft. However, as this requires buds to be ‘threaded’ through a hole in the trunk, it is probably best to use a tree with small compact buds. Ideally, I would be looking at either a Japanese Maple or perhaps even a Hornbeam. Certainly not a Beech 
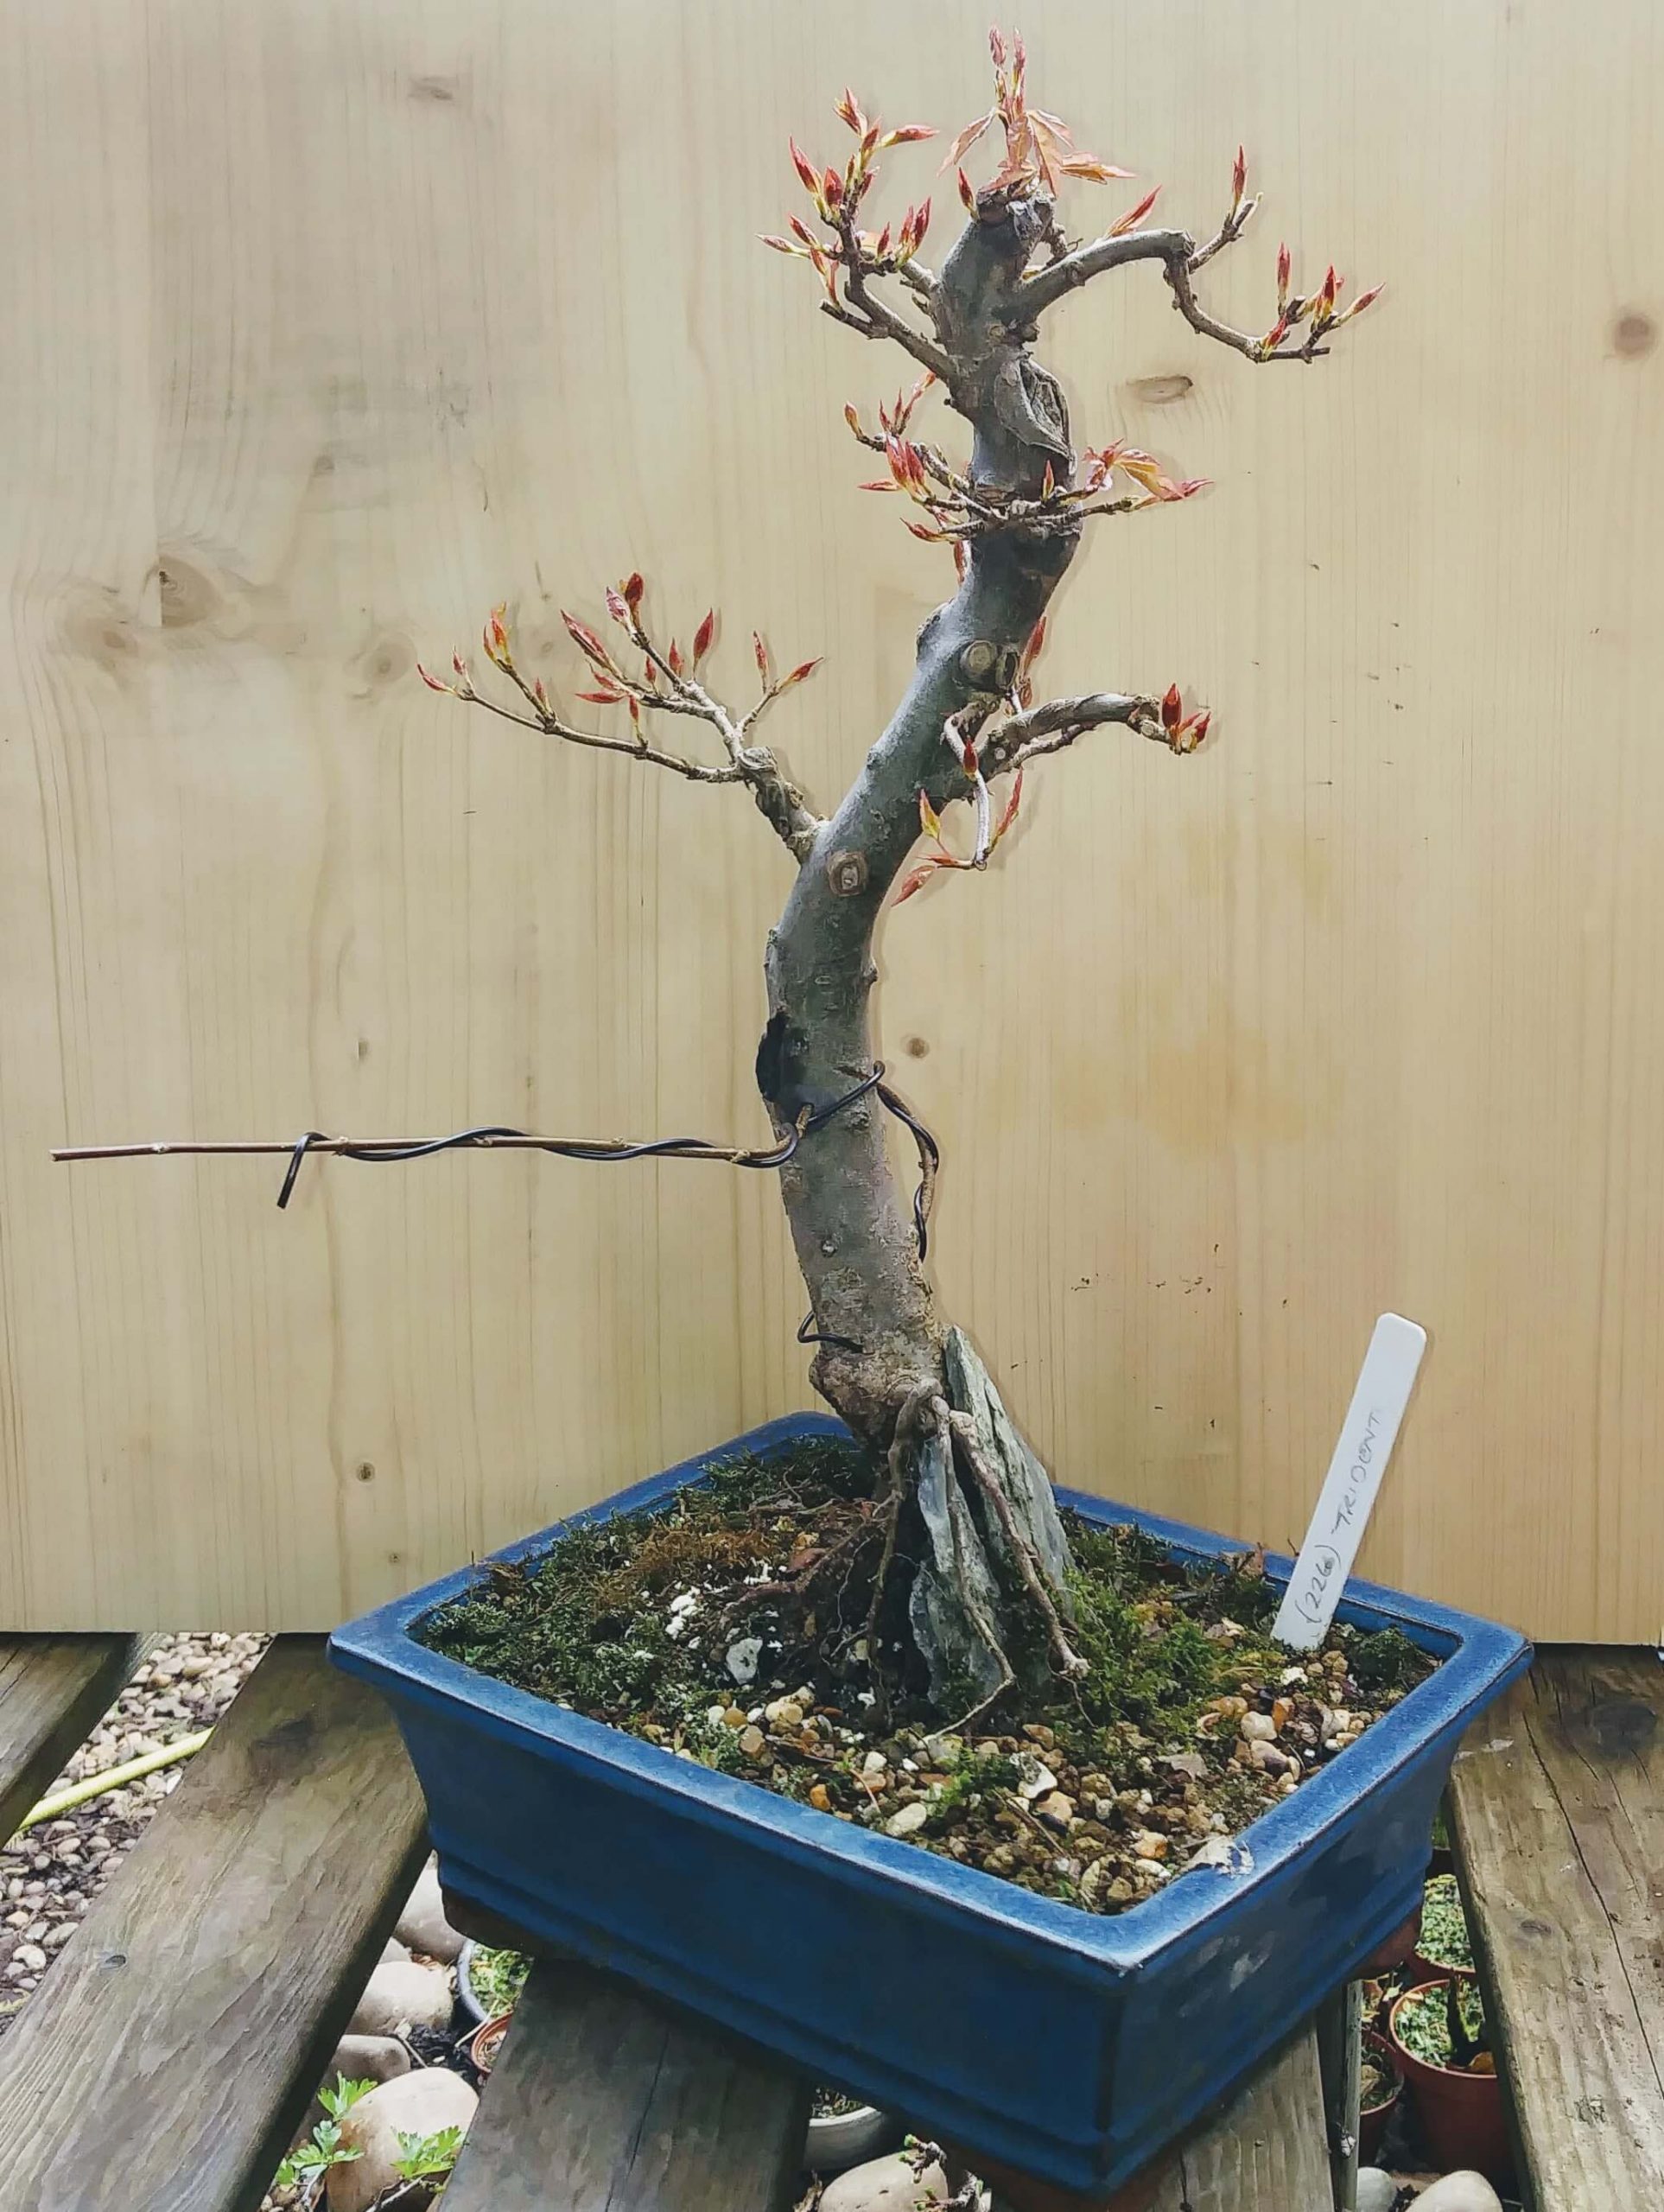
Another point to consider is whether or not the species you want to use buds readily from old wood. Both Hornbeam and Trident Maple regularly send out new growth from unexpected and advantageous places on the trunk of a bonsai. With this in mind, I find it better to wait a few years before deciding on Thread Grafting as an option.
The key factor is the bud size, because your aim is to be able to thread as much of the whip through the trunk as possible – you want a nice snug fit, without knocking off the buds you need for this to work.
What Tools do I need?
- Power Drill and correct sized drill bit.
- A whip from the tree OR a matching cutting in another pot.
- Wire to support and hold the graft.
- Grafting knife to clean the wound and expose the cambium.
- Wooden Toothpicks to act as wedges.
- Cut Paste (To seal around the whip / wound site).
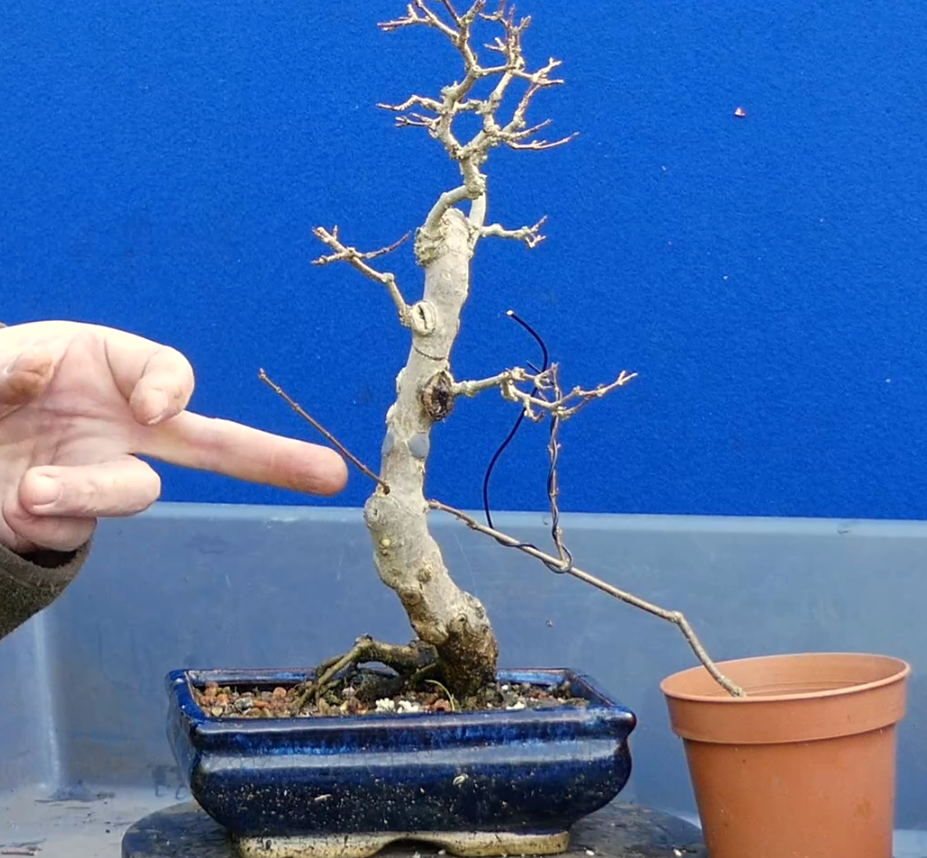
Selecting the best Trident Whip Cutting.
If you have been able to plan ahead of time, then you would have allowed several shoots to extend from the
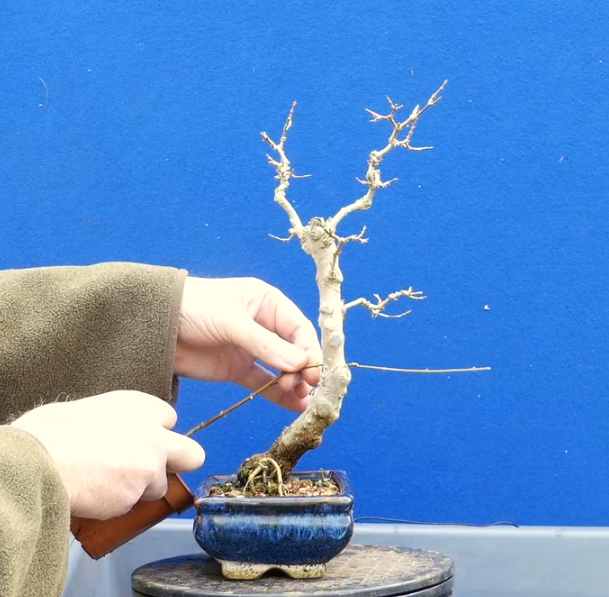
previous growing season. These can then be manipulated with wire into the required position for the graft to take place. If you are using growth from the same bonsai then it is always best to apply wire to that branch first. Usually up to the point where you will be poking it through the trunk. Make sure to leave a decent length beyond this point to allow you to wire the end of the branch once it has been ‘threaded’.
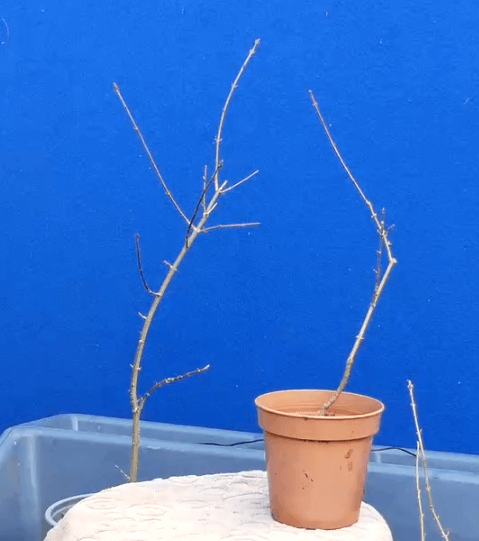
If you do not have long enough growth from the previous year then hunt around for some 2 to 3 year old rooted cuttings. You are looking for something that is really just a single slim shoot that will be easy to work with.
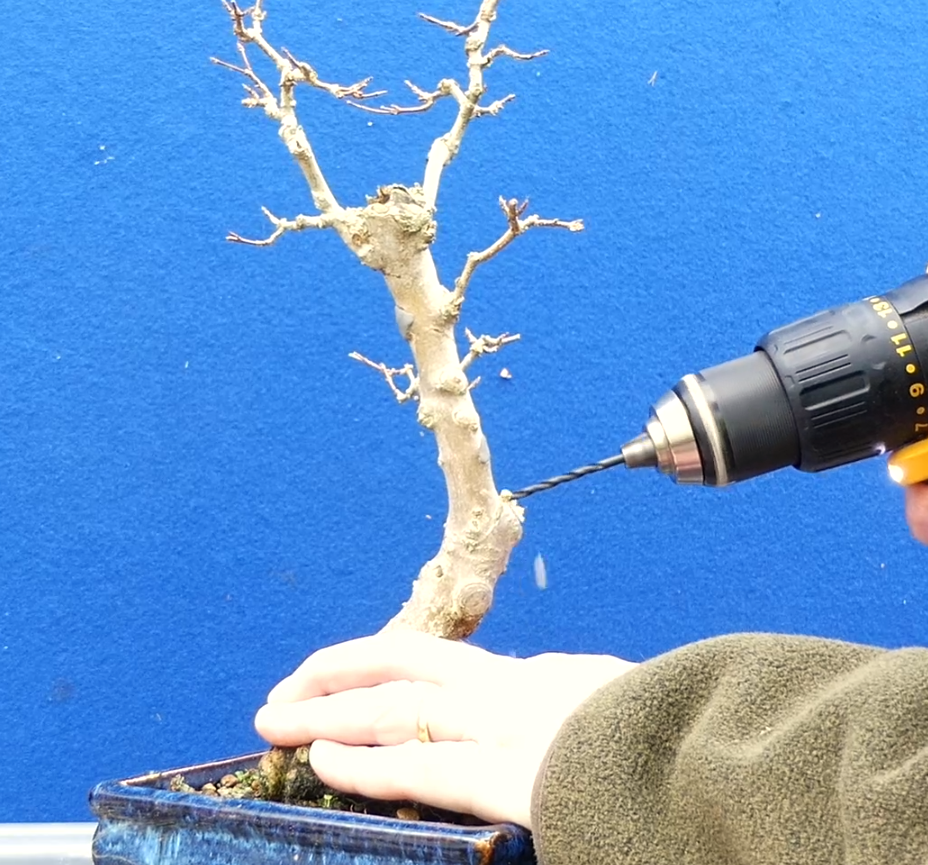
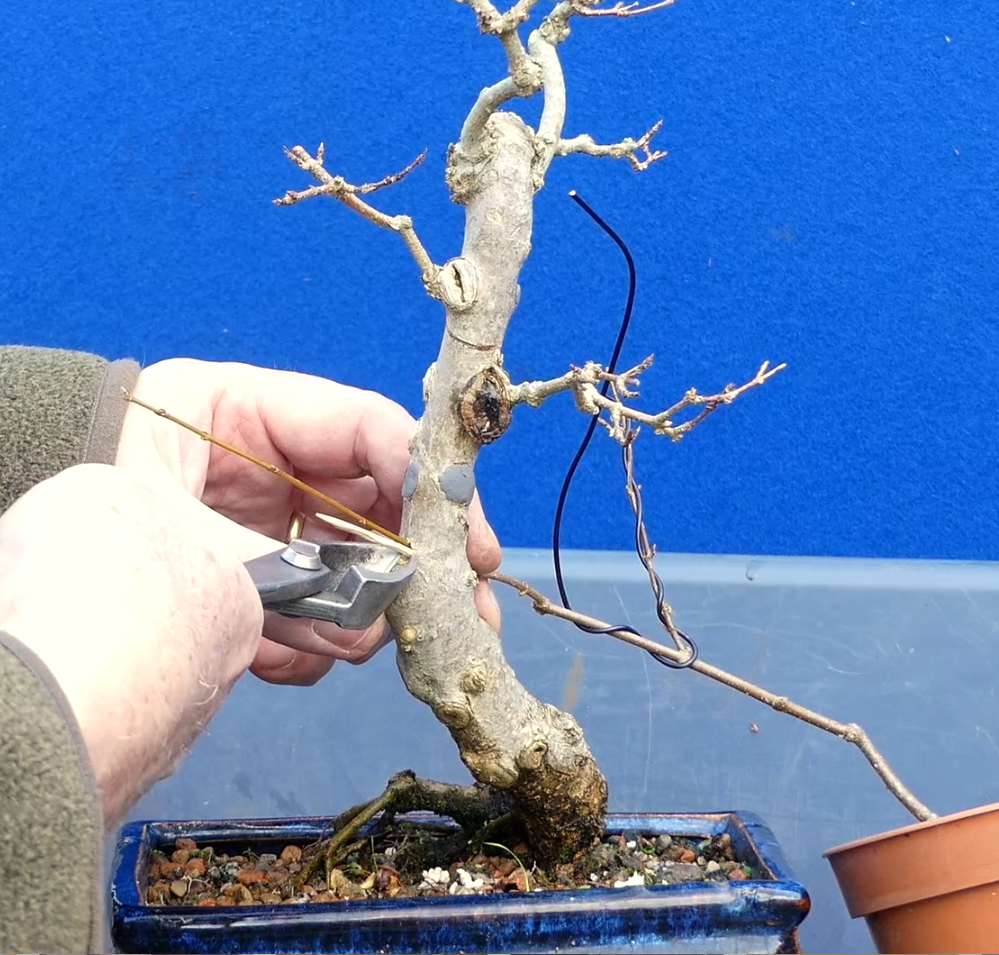
Some drilling is required.
I use a standard drill at normal speed. Some people recommend using a slow speed but I have found this can result in more damage to the tree. Make sure you have marked exactly where you want the whip to enter and leave the trunk. Use a screw or sharp object to create a guide hole for the drill bit. You definitely don’t want to have it sliding across the bark, causing unwanted damage.
The KEY TIP is to start drilling where you want the whip to exit from. This ensures you will have the smallest possible hole for the graft to take. Remember that when drilling, it is the EXIT hole that is always larger and often, ‘blown out’.
Once you have finished drilling then be sure to use some wire to poke out any debris. Clean up the edges with your blade or knife to make the site of the fusion a lot more receptive to the whip when it is wedged in place.
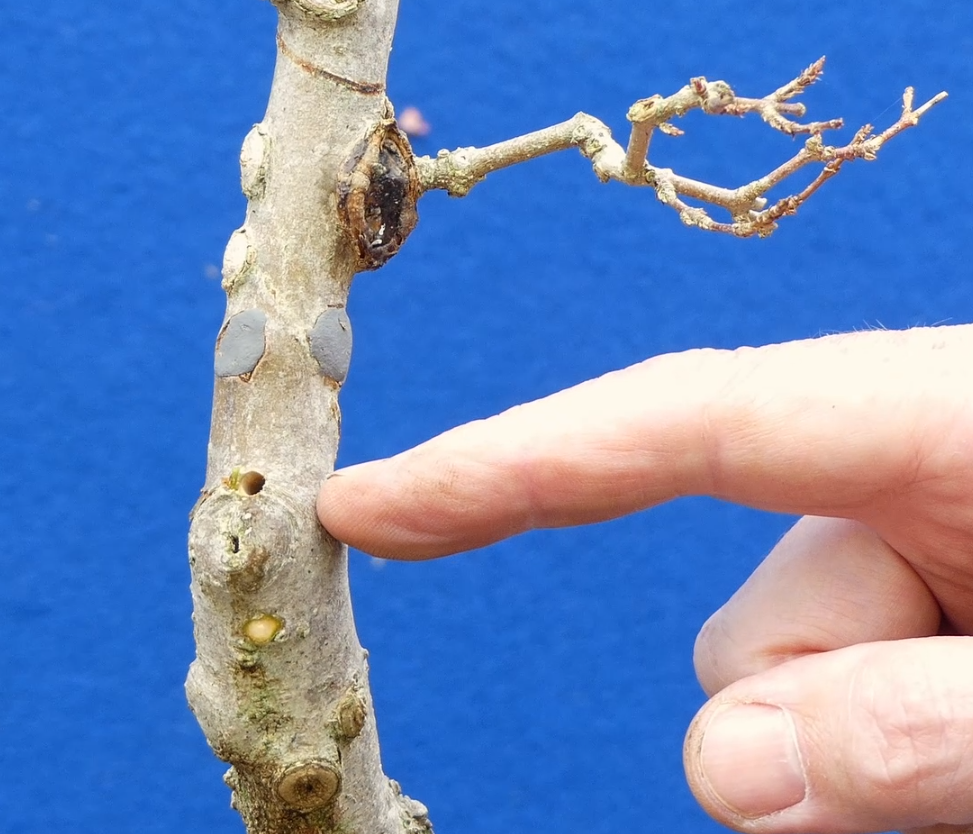
Doing the Thread Graft:
This is the simplest aspect of the operation and requires you to carefully push the whip through the hole you have created UNTIL you are unable to safely push it further without removing buds. Then use the remaining wire to secure it in place and/or wire to the whip end for branch movement. This is easiest explained by looking at the picture.
With thin barked trees like Maples it is not necessary to expose the cambium, however, I do this anyway and then wedge it against the upper side of the drilled hole using toothpicks. This method is aimed at making the fusion with the mother trunk more effective. If the whip and tree is healthy then as the buds open and extend (through spring) the shoot will thicken causing fusion to take place at the exit and entry points.
Do not carry out any operations on this tree as you want all of its energy to be directed towards shoot thickening. I would definitely recommend keeping the tree out of the wind or any sort of direct sunlight until you have seen a good flush of healthy growth.
Aftercare:
I would keep the tree fertilised and well watered and cut back a lot of the growth EXCEPT for the threaded whip. I would allow this shoot to extend as much as it can and leave it unpruned. The aim is to encourage thickening and this will only occur if there are buds and new shoots growing off of it.
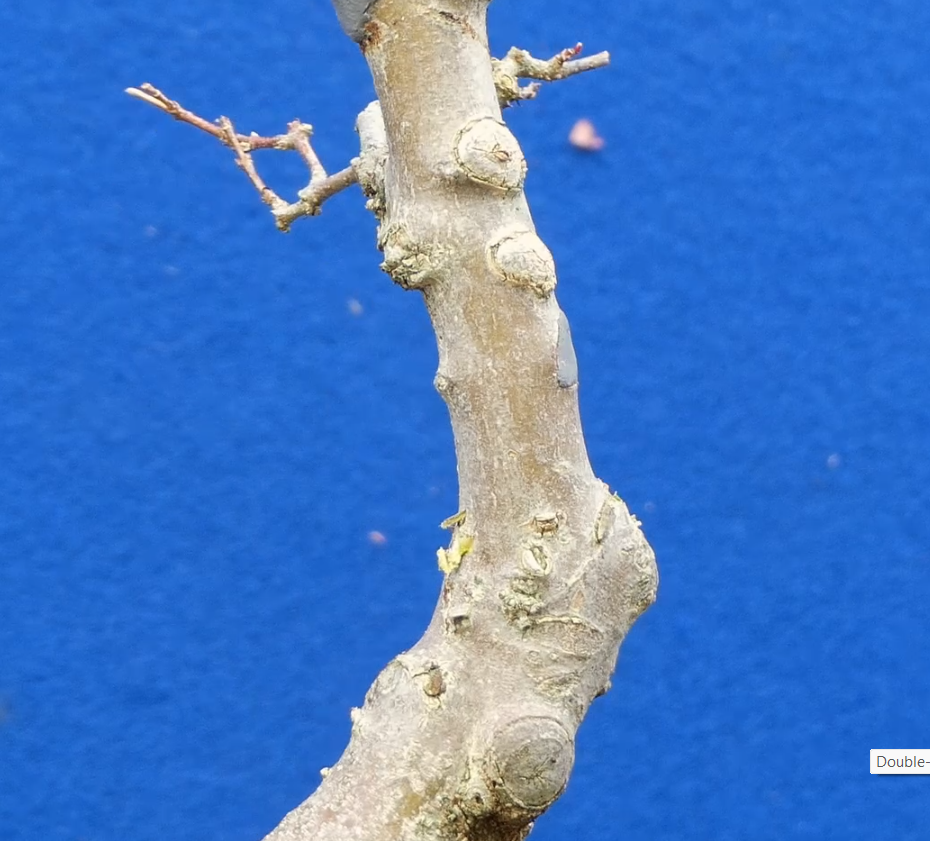
Watch out for any wire that you have used – as would be the case for any bonsai. Keep an eye out for signs of thickening and callousing around the exit point of the graft as this should be a sign of succcess.
I will be expecting to seperate the whip from the original cutting during the following spring (2025).
UNDER NO CIRCUMSTANCES SHOULD YOU EVER HAVE A ‘BRAIN FART’ AND UNEXPECTEDLY STRIP ALL OF THE NEW BUDS FROM YOUR GRAFT
God Bless & Happy Bonsaiing
Xavier
In this video I talk through all the Essential Bonsai tasks for December / January. With the temperatures dropping, what do I REALLY need to do to protect my trees? I look at the choices I make to protect my valuable bonsai & developing saplings / Pre-Bonsai. Grantham is Zone 9b so overnight temperatures rarely stay below -5C for longer than a couple of days (if ever). The biggest issue I have to deal with in my garden nursery is the howling gales that constantly freeze the tips of my ramified bonsai!
So what can you do? Easy – watch the video and find out. Or, you can just cast your eye over the headings below and get an idea of what I will be doing before settling down for Christmas Bonsai Carols…
AND…There is so much work to get done before I can finally update my ACCESS Bonsai Management System.
SUBSCRIBERS PHOTOGRAPHS EDITION
This week I am also showcasing more bonsai photographs from Subscribers. Submissions have been sent in from the following people:
Chris, Joe, Susan, Vinnie, Joe G and Dan of The Bonsai Project.
Topics Discussed:
What Bonsai really needs winter protection?
Is Chinese Elm very cold hardy?
What is a safe location for your Bonsai?
A last ‘wire’ check.
Plan for next Springs repots.
Make sure Display Benches and Pots are checked.
Applying my Dormant Spray.
Check stocks of soil, pots, fertilser & bug sprays.
Subscribers Photographs.
A word about my Access Bonsai Management System. (Bonsai App)
God Bless & Happy Bonsaiing
Xavier
Three days ago I uploaded this video to YouTube, and guess what? I have done nothing from that long list of tasks! The wind has been howling around the bonsai garden and rain has also made an appearance. The best thing about it, is that it stopped ‘drill man’ from featuring on my next video soundtrack
Seriously, I did spend all weekend breaking up the rotting benches and also cutting up and clearing away a lot of last years dead branches – left kindly by my very expensive Tree Surgeons (not sure that is the best description). Then I had the joy of meeting our very well paid ‘Rubbish Disposal Technicians’ who were happy to watch me struggle with a diverse range of rubbish. Why do they have to be so rude and unhelpful!
I was actually told, bluntly, that I had to hold my rotting pieces of wood and NOT put them on the ground – whilst waiting for the current load to be compacted. Now I know I’m not exactly feeble but I did struggle to understand why he was so adament I could not put them on the ground whilst waiting!
I started to become a wee bit uppity and then stopped myself as he suddenly spurted out some **** about ‘Health & Safety’ rules! These council departments have so much power and the last thing I needed was to be slapped with a Tip Ban for being ‘aggresive or confrontational’…
So of the 5 Things I should be doing now, I can definitely mark myself with a big green tick. Dry and ignored Dawn Redwoods watered, benches removed, majority of trees are happily dormant AND everything is safely tucked away from the wind. I even moved my little Forsythia into the coldframe for some additional protection due to unwanted bud swelling. I suppose I now need to let you know how I have got on with the 10 Tasks for Winter (or not)…
Deadwood Work.
Do you know how cold it is right now? I mean, I did look at a few Bonsai with deadwood but then the rain hit hard and I had to run away inside and comfort myself with a hot chocolate. By the time the rain had stopped, my enthusiasm had waned. So I reminded myself that there is always summer to do this job. After all, why do something now when you can enjoy it much more in 6 months time! A bit like cleaning dirty bonsai pots…
I did plug the dremmel in to a power socket and set my studio up with Andy’s lump of wood. And I did even look at it for several minutes. I tutted and mused over different ideas and drew all over it with my HB pencil. Not sure why, because I have never followed any pre-planned cutting lines in the past.
Having decided where I was going to start channeling out this piece of trunk I realised I needed my safety glasses and gloves. Although I didnt find the left glove I did manage to find a packet of Doritos instead…perhaps a sign that this job should be done another time too
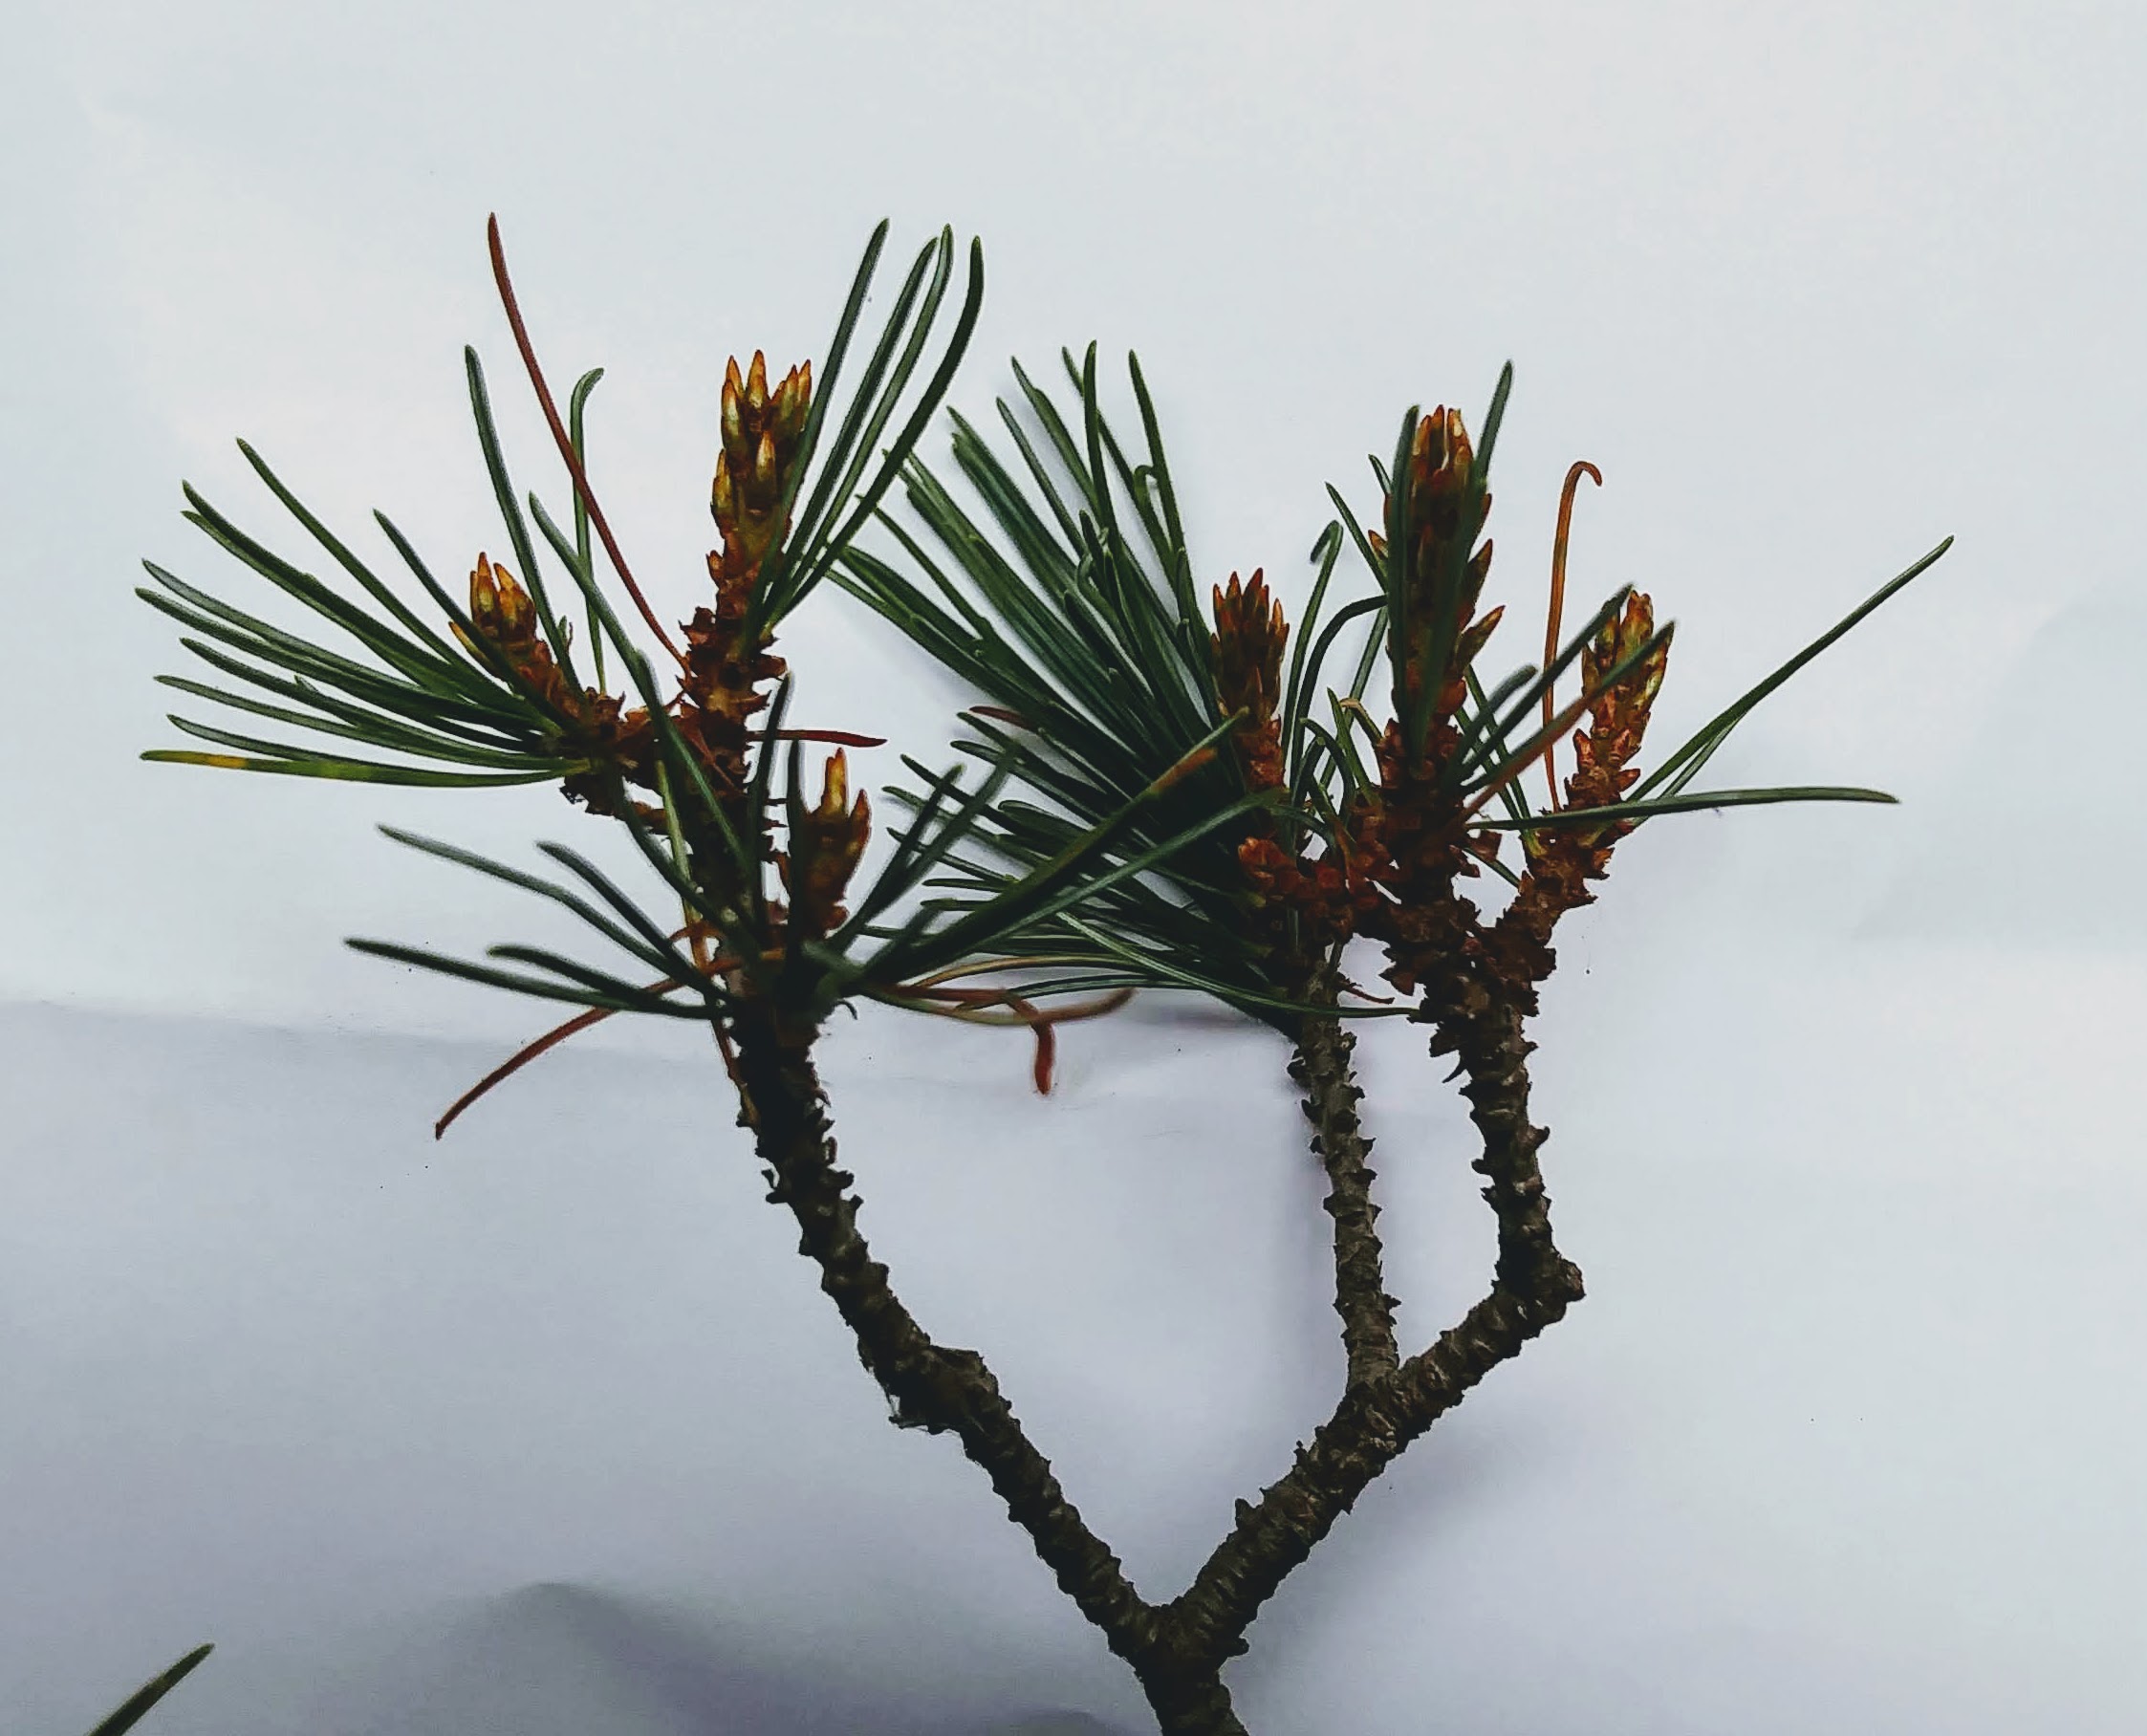
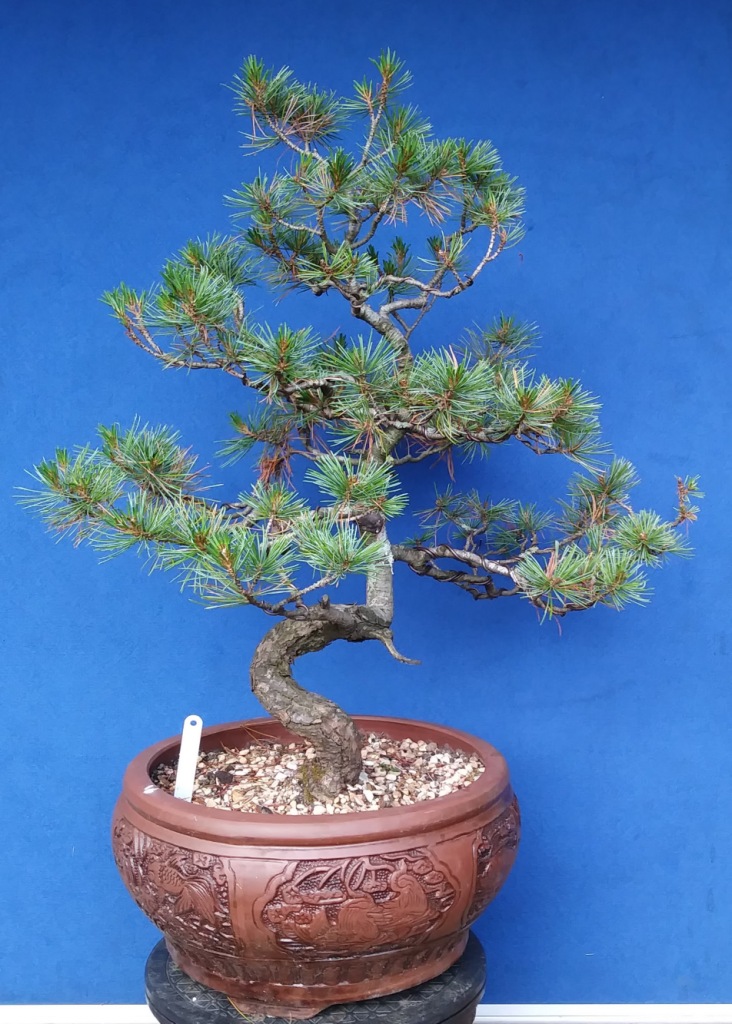
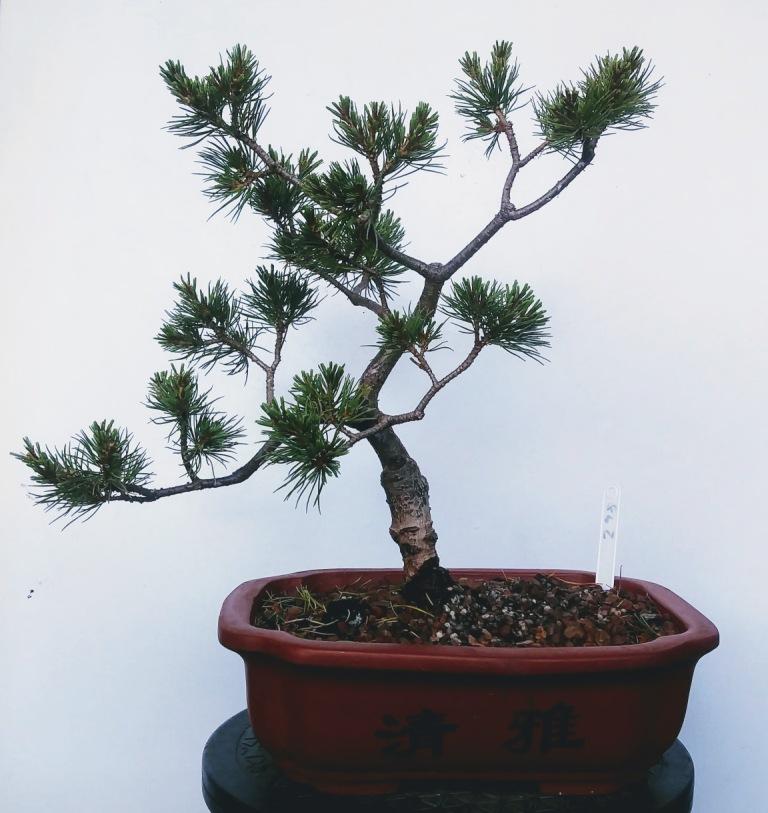
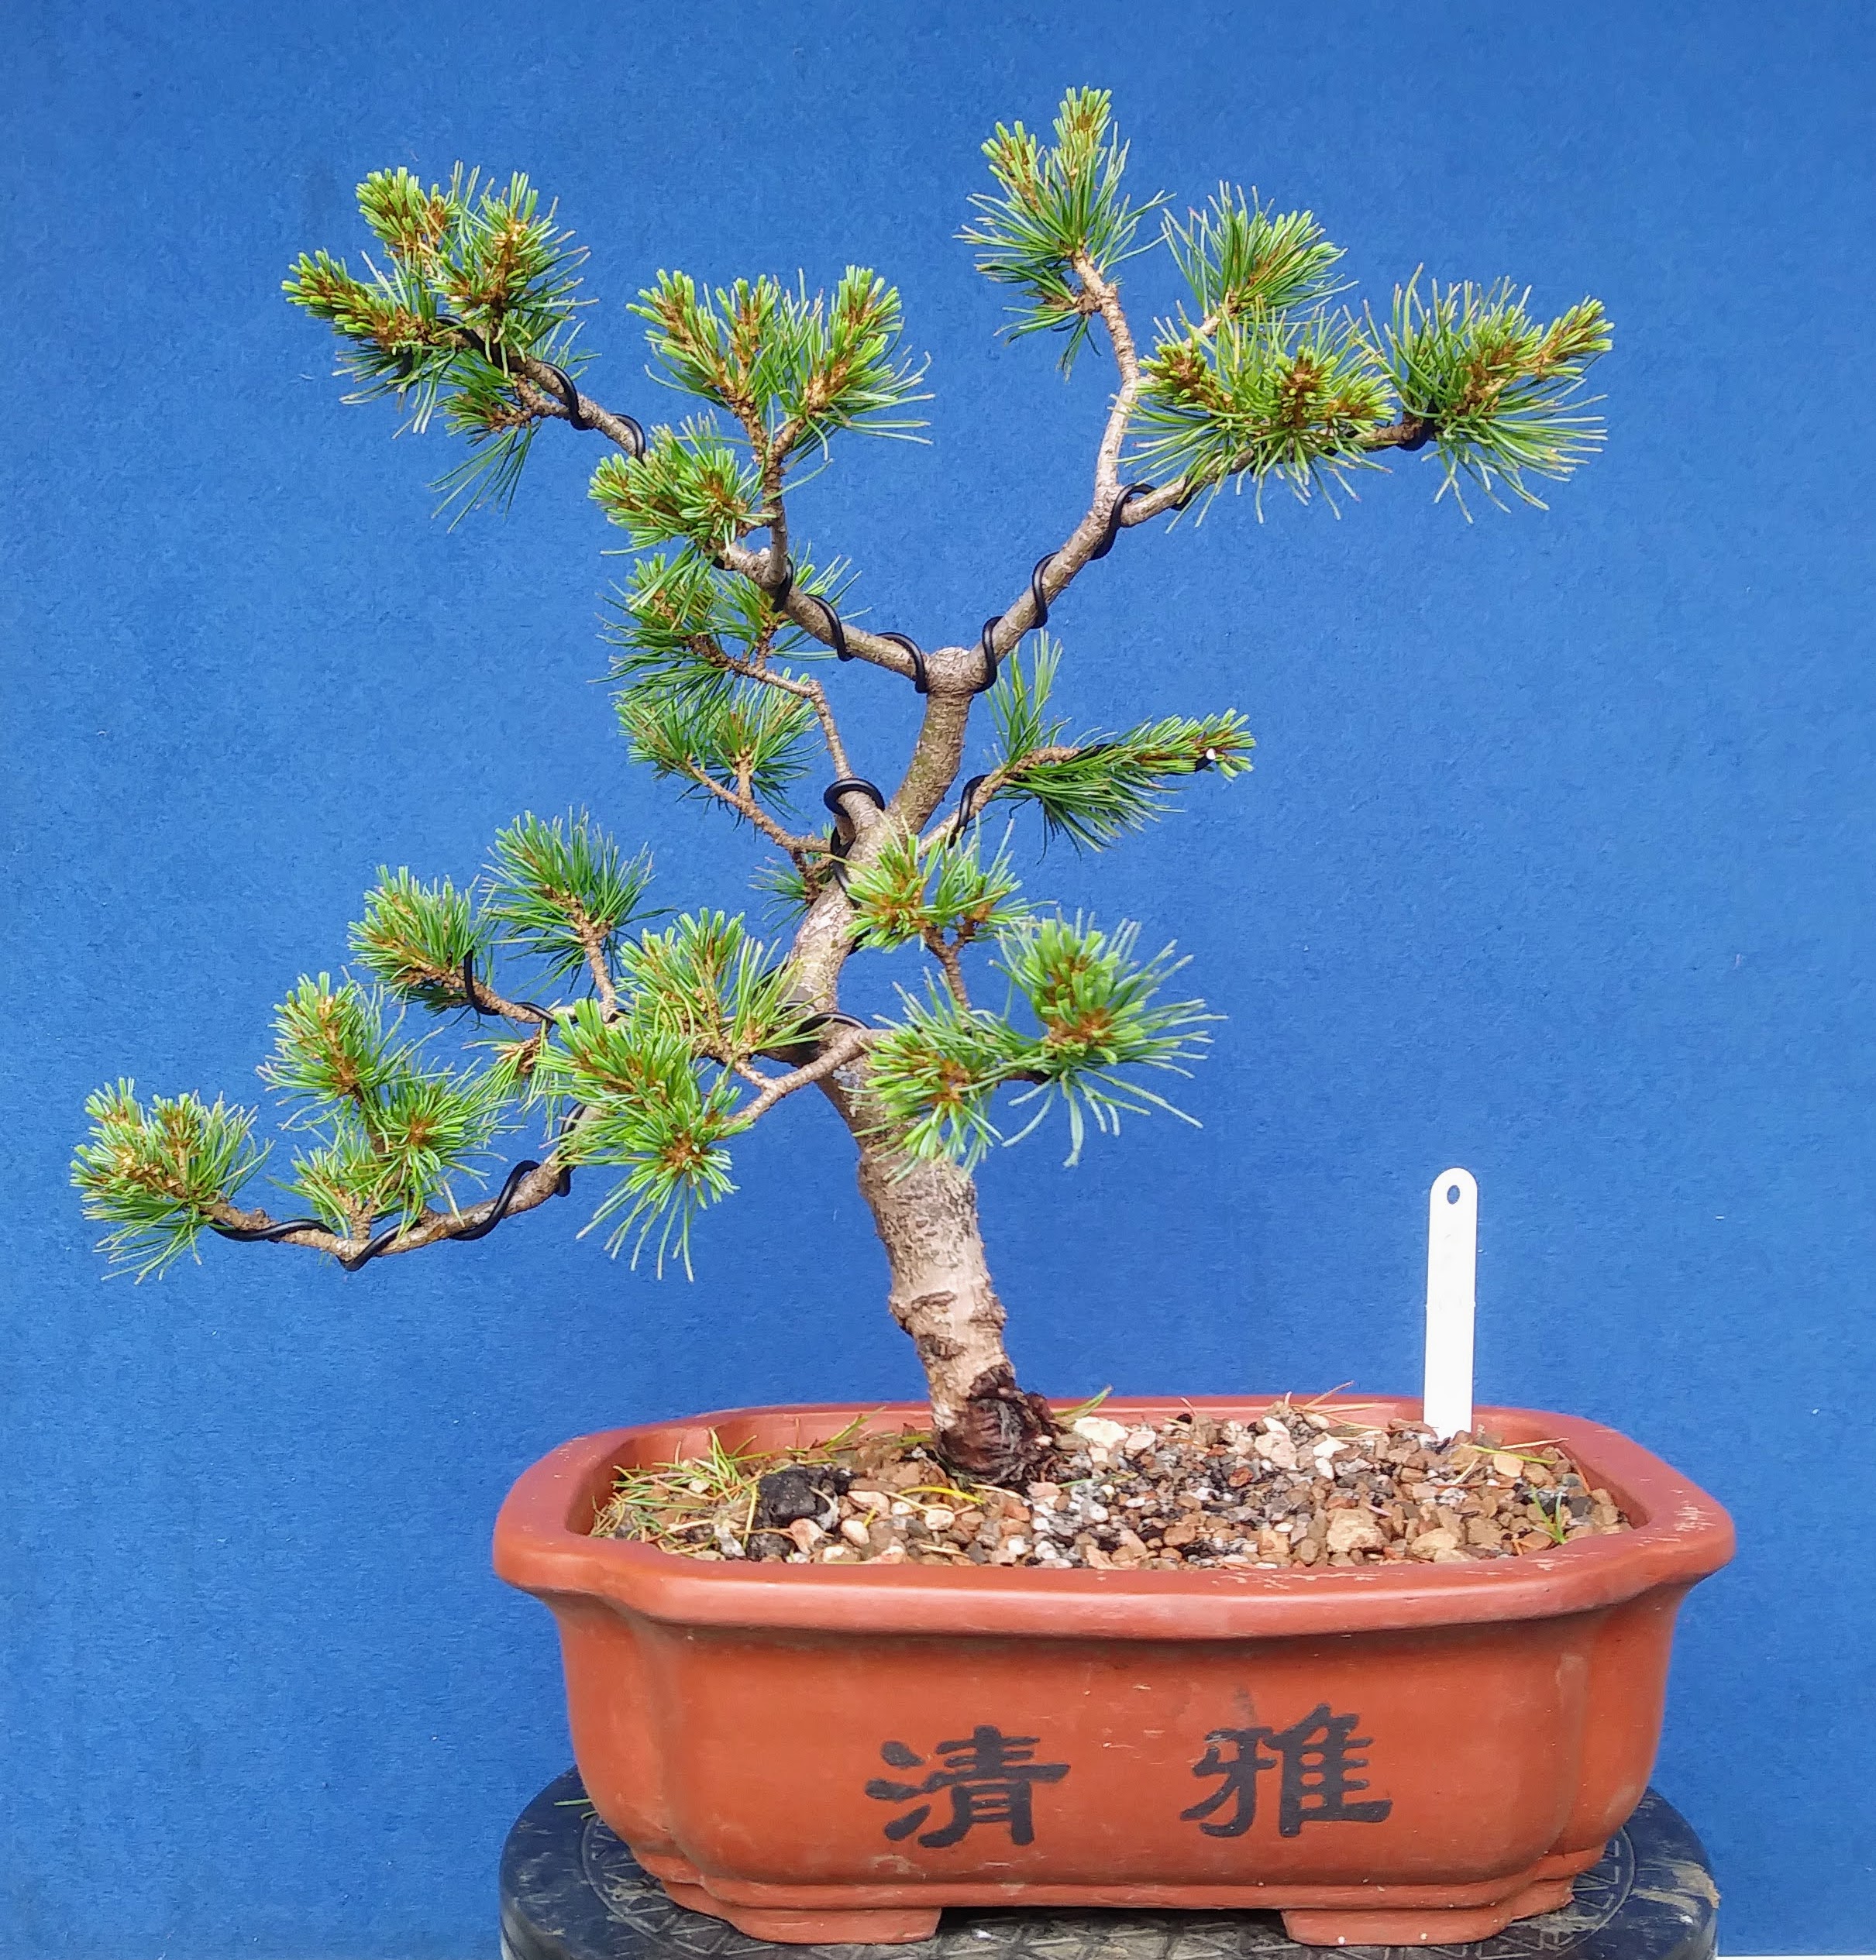
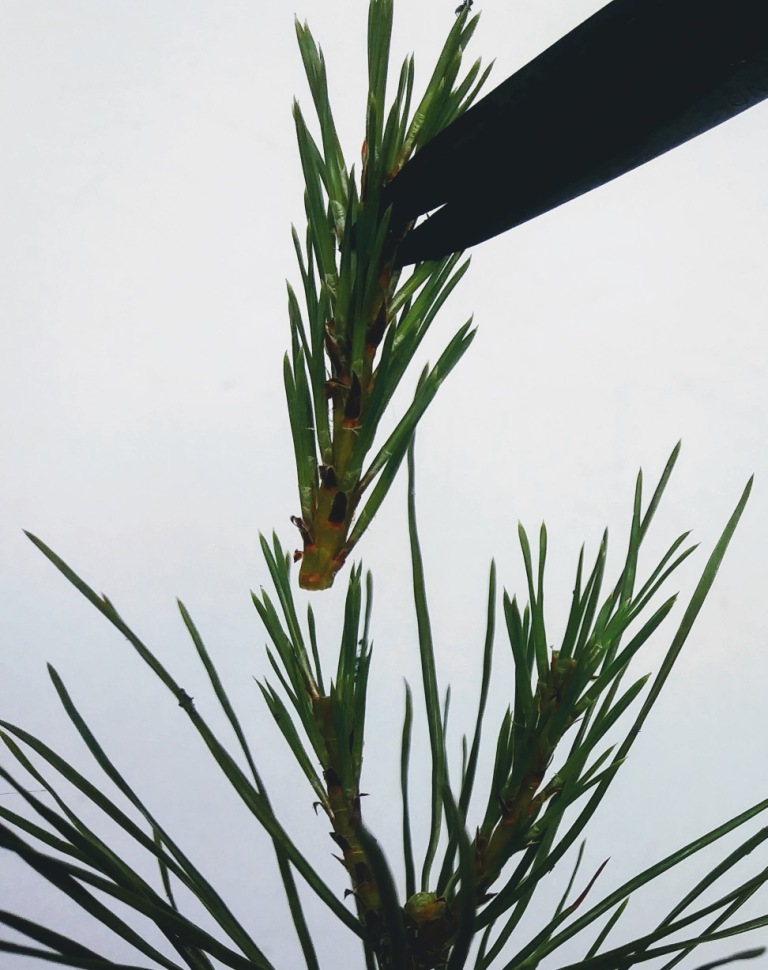
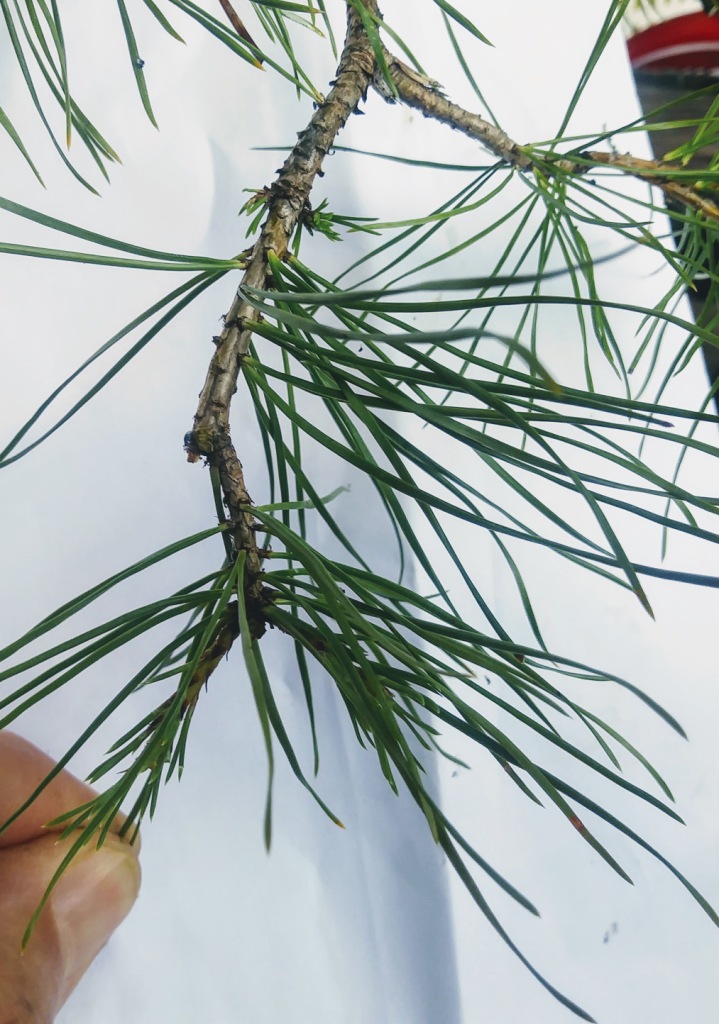
Clean up your Pine Bonsai.
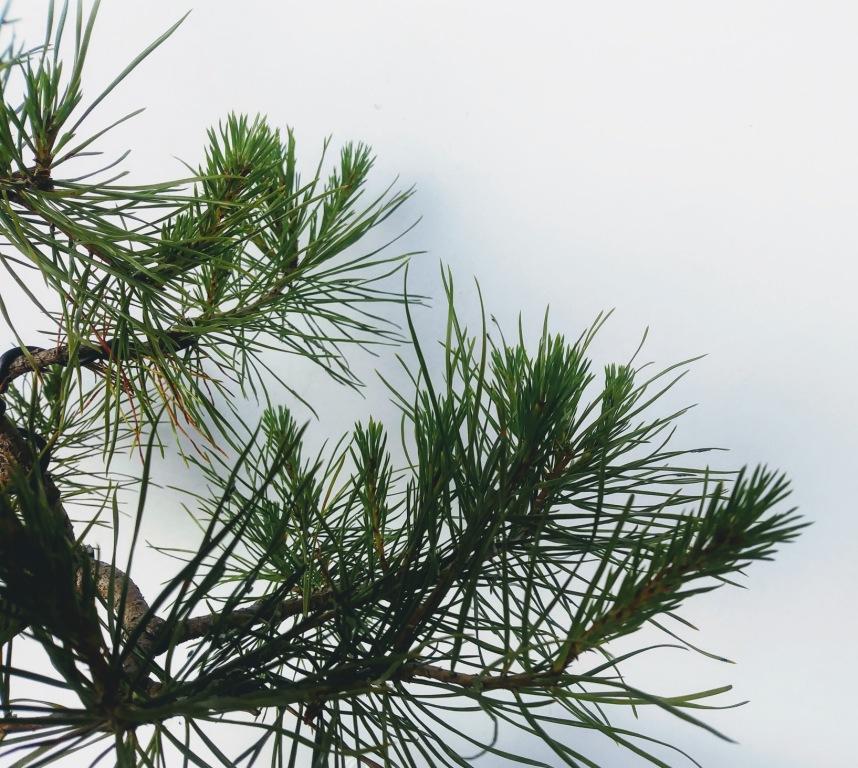
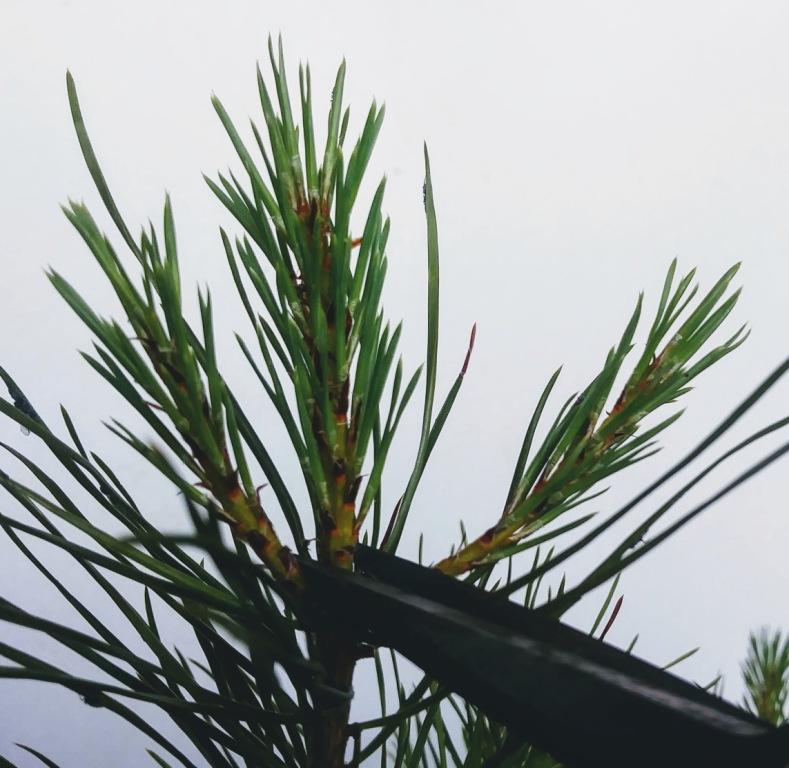
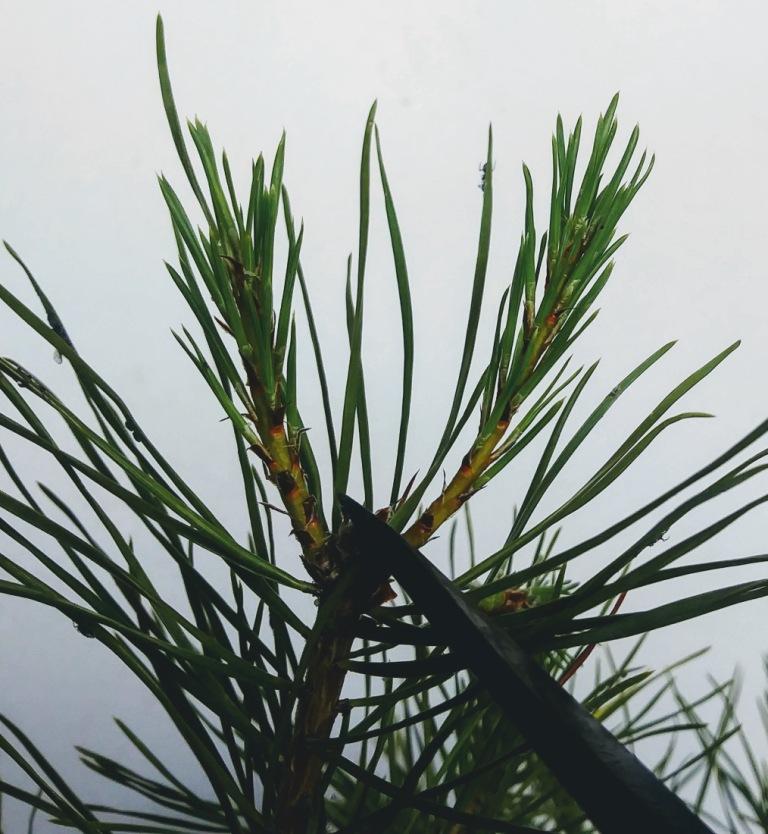
If you watched the video you will already know that I did my Pine clean up work in Autumn. I did find a few dead needles and one or two terminal buds to remove but I am happy these can be left for a good few months yet. The next bit of work will not be till late spring when the candles have elongated.
Bonsai Bench & Garden Clear-up.
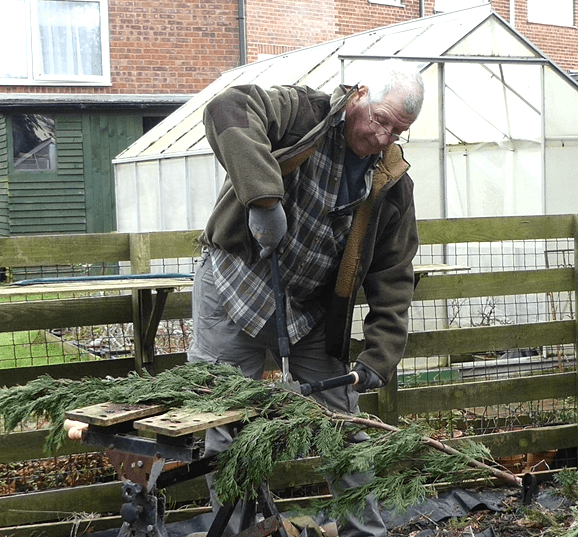
I spent all Friday with my serrated saw blade and branch loppers to reduce everything into easy to handle pieces that I could pack into my old ‘skip’ bag. The benches themselves fell apart as soon as I showed them a picture of my hammer. It appears the only things keeping them standing were the wood louse. I can happily report that I achieved this momentous task without injury – a definite first for me
As for the Tip run…well, enough said at the beginning of this article.
Create Rock Structures for plantings.
I have the glue ready and the lava rock ready but unfortunately my studio lights have decided to blow their bulbs, making it impossible for me to film. I suppose that means I need to get some more hot chocolate instead…
Building my new Website Pages.
I am loving this task and my biggest fear is it will distract me from my Bonsai Channel too much. At High School I majored in Journalism and Literature. I love nothing better than spending a day just creating articles or starting ‘another’ prize winnning novel. Needless to say, they remain unfinished – like most of my creative projects. I really do need to learn to commit to something and stop getting bored and distracted.
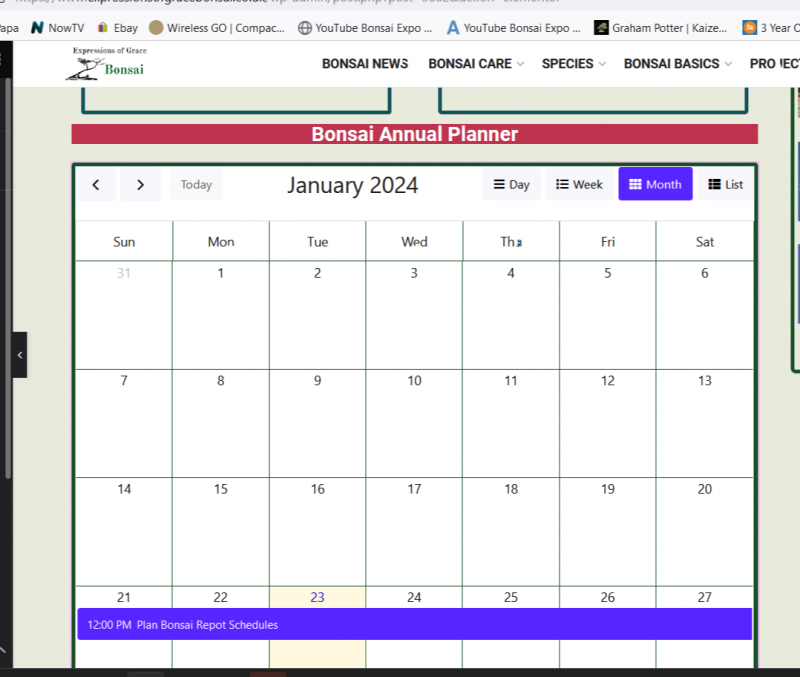
There is so much work to do to make this website really useful and so many of the pages need lots of work. The calendar may be the biggest issue with the volume of entries I need to start putting in it.
Update my Bonsai Workflow App.
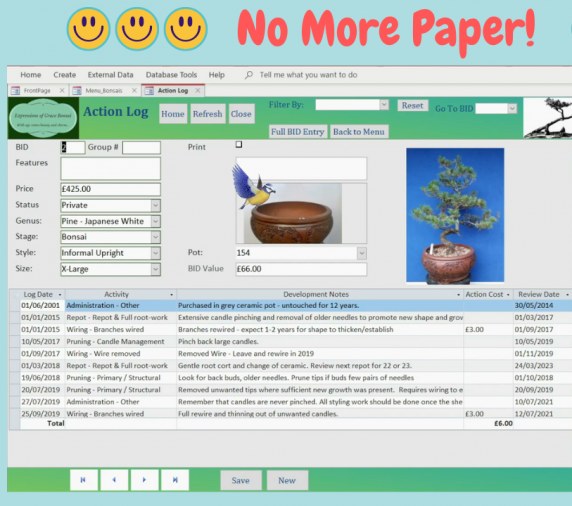
The day after this video was released 8 people asked to try the app from various parts of the world. Since then, I have sent out another 7 files. Lexi and I are absolutely blown away with the interest and pray that there are no major issues using this product. It has worked so well for me during the last 4 years AND the first group to use it have also reported postive results.
If you have taken advantage of this offer then please provide postive feedback in either the comments here or on the tuition videos uploaded to YouTube. You are of course more than welcome to send a Gift Donation via Paypal to help me spoil Lexi for her hardwork
Bonsai Soil / Wire & Pots.
You all know that I have 29 bags of Zeolite and Pumice thanks to an order put in by my good friend Alex. I also still have another 4 bags of Kitty Friend, 100 litres of vermiculite and a little bit of Pine Bark. So I don’t forsee any issues with repots this spring. I do need to order in a few rolls of 2.5mm and 3mm aluminum wire but that can wait for a few more weeks. The price has remained pretty constant at £12.50 for 500g.
I did order over £100 worth of Pond Baskets for my Japanese Maples and last years succesful seedlings. That is going to take a lot of time and this will be subject of one of my repotting videos. Everything gets more expensive each year!
Cleaning Pots:
Everay day I step outside and then shudder in fear as I look at the piles of dirty and uncared for bonsai pots. They litter most areas of my Nursery and have been the biggest thing ignored over the past 4 years. I think the idea is good – but it is a little too cold right now!!!
Establish Bonsai Repots and Pruning Lists:
This is an ongoing nightmare. I already have three A4 pages full of URGENT repots and the top of that list involves my Chinese Elms. Some of these imported bonsai have not seen new soil in over 5 years – might also explain the occasional deaths. Since starting a YouTube channel I have definitely found it impossible to keep up with this important job and my trees have suffered. I think someone once accused me of ‘Tree Cruelty’ in one of my early videos. I may not agree with the tone of the comment but I cannot argue with the sentiment. I have too many trees to be able to care for them properly.
Managing your winter watering.
In truth, this doesnt present much of an issue. The Dawn Redwoods missed out because I had stacked bags of bonsai soil on the bench above them – DOH!!!
I have visited the coldframe a couple of times this month and found most of the bonsai are happy and ‘refusing’ free drinks from me right now.
ANYWAY…
I have just spent another 2 hours writing this blog so I shall sign off here with a reminder of my biggest Bonsai fear: False Spring
Every year I wait as long as possible before starting repots on my Trident Maples, knowing that we always get a dramatic return to freezing nights (for about a week). This has put my Bonsai back over the past two years and my Tridents are without a lot of their branches as a result of this. Fingers crossed this year will be a mild entry into spring and the dreaded False Spring will stay away for once
God Bless & Happy Bonsaiing
Xavier
]]>
Six years ago I had grand plans of selling bonsai online and hosting visitors to my Backyard Bonsai Nursery. To make this a reality I would need a website – and a lot more education! Skip forward to 2023 and the site looked pretty good…yet still the shop remained ‘An Unrealised Dream’. All the Blog posts and Projects pages had been uploaded. I had sections relating to Species Advice and Bonsai Sitting Services. Yet their was still nowhere to purchase anything online. So what went wrong?
Lockdown in 2020:
Everybody was effected by the pandemic and knock on issues it caused. The biggest for bonsai hobbyists was the crippling price rises associated with packing crates. Many nurseries saw a fourfold increase in transport and this had to be recouped by price rises. Shortly after restrictions had been lifted I drove down to Savin Nursery to pick up more stock for a ‘Grand Opening’…
That visit changed my entire outlook. It was clear that the days of cheaper imports had gone for good. Without a reliable source of budget stock I knew it would be impossible for me to maintain any sort of credible business model. I still had a reasonable number of ‘mass produced’ Chinese Elm and Trident Maple but I knew that there were no replacements coming. This was the point I chose to take my plans in another direction…
YouTube Arrived:
On February 22, 2022 I uploaded my first bonsai video to YouTube under the banner of ‘Expressions of Grace Bonsai’. Within a few weeks I had my first 50 subscribers and by August had reached the incredible figure of 500! I was now creating three videos / week and was working fulltime to keep both my trees and content going. By January 14th 2023 I achieved the milestone of 1000 subscribers and was immediately monetised. My first payment was a ‘whopping’ 8p from a video about wiring
The excitement of video production and editing took me back to my school days at Upwey High – where I excelled in Drama and Journalism. Finally, i was able to fulfill my true vocation spurting rubbish in front of a camera.
Any Other Nursery Progress?
I had severely underestimated just how much time I would spend on YouTube and any plans for revamping my website or sorting out a ‘new’ sales strategy quickly dropped off my priority list. Editing and producing videos took a lot of time and energy and I still had to carry out the regular building work on the bonsai ‘not featuring’ in videos. By this stage I had well over 700 trees in various stages of bonsai development.
I was still selling trees occasionally using Ebay and had started seeing an increase in visitors to the nursery. The visits were the highlight for me and it was rare for somebody to be ‘in and out’ in less than 2 hours! I am always more than happy to sell trees from my garden as it does not require the additional stress and costs of packaging and postage.
I was also delighted to be invited to a couple of village events where I was able to share my passion of bonsai – whilst seeing some trees sold too
Monetised after 11 months:
It astounded me just how much work was required to sustain and build the channel. The monetary gain was negligible but the prospects for growth were very real. Within a further 5 months I reached 2000 subscribers and was averaging 1000 views / video – which equated to about £5.30. When you consider each video takes about 10 hours of production time – well I won’t break that down into an ‘hourly’ rate.
The biggest gain for me was the incredible volume of Community Engagement through the channel. Although it wasn’t financially productive, the number of regular subscribers who kept in touch through comments and other social media outlets was beyond belief. I now have a strong group of ‘like-minded’ colleagues and a growing number of friends. Despite the loss of my wife in 2020 I finally believed that my life could start again.

A Change of Name:
It was in early 2023 that I made the decision to change my channel name to ‘The Bonsai Retreat’. This was related entirely to the Google Algorithm and had an immediate postive influence on my growth. Ultimately, the word Bonsai wasn’t being seen quickly on the search page of mobile devices – the revised channel name has made all the difference. Of course I do miss being identified as Expressions of Grace Bonsai and I think that is one of the reasons for revamping my website.
By the new year of 2024 my subscriber base had climbed to over 3000 and my videos were regularly achieving 1500 views. I did have a couple of ‘break-out’ videos, one of which gained 10k views and earned me £43.15. Certainly not enough to retire on but pleasing none-the-less. The biggest issue I faced was stopping myself from feeling a ‘failure’ because other channels were doing much better than me. I started around the same time as 5 other creators and they were all achieving much bigger success in growth and video views.
However…I just had to remind myself that my primary aim for YouTube was: rebuilding my self-esteem, gaining confidence and building a circle of friends and colleagues. This I most certainly have achieved, so anything else is just a bonus
The Future:
I have taken the decision to reduce my uploads to 1 or 2 per week which will allow me more time in the bonsai nursery developing my trees. I am currently planning the uploads for the new season and intend to maintain my chatty VLOG style approach. I am definitely not knowledgeable enough to be considered a ‘teaching channel’ but my experience is enough to appeal to the enthusiastic bonsai hobbyist. But I will leave you to decide that
This website will become ‘BLOG’ centred and will allow me to promote new uploads as well as give regular informal updates on things planned for The Bonsai Retreat. I will work on promoting my Bonsai Portfolio pages which will provide a pictorial timeline of ongoing projects. I will also be running a Calendar which will allow viewers to see when I have certain bonsai work planned throughout the year.
I still sell Bonsai from the nursery and via personnal approaches using the contact page. Visitors are also welcome and all I ask is that you let me know you are coming to ensure parking is not an issue (I live in a small cul-de-sac). I am literally 5 minutes off the A1 and 3 minutes from Burger King and KFC…
I shall also be looking to promote the ‘Accesss Bonsai Management System‘ developed by my daughter to allow others to benefit from this ‘free’ application. I have a lot of development plans in store for the nursery itself which will include new ‘sponsored’ display and work benches. But for now…
All the best & Happy Bonsaiing
Xavier
p.s.
Please be patient and allow me the time to continue the website building process. I am happy that it is sufficiently completed to allow a decent experience for viewers BUT I am definitely aware that more work is needed and many pages remain incomplete…
Having removed the tree I could see that the entire root system was affected by this white substance. I removed as much of this as I could and looked for any live roots. Having cleaned it up as best I could I repotted it into a larger ceramic and left it somewhere shady to die 
I wasn’t convinced that this fit the description of either of the diseases mentioned but still had no clear idea of ‘why’?
In 2019 I finally treated myself to several completed ‘root-over-rock’ Chinese Elms. I had always promised myself that I would invest in some premium bonsai once my nursery sales had increased. Spending over £600 for just two tree’s was my biggest ever outlay but well worth it
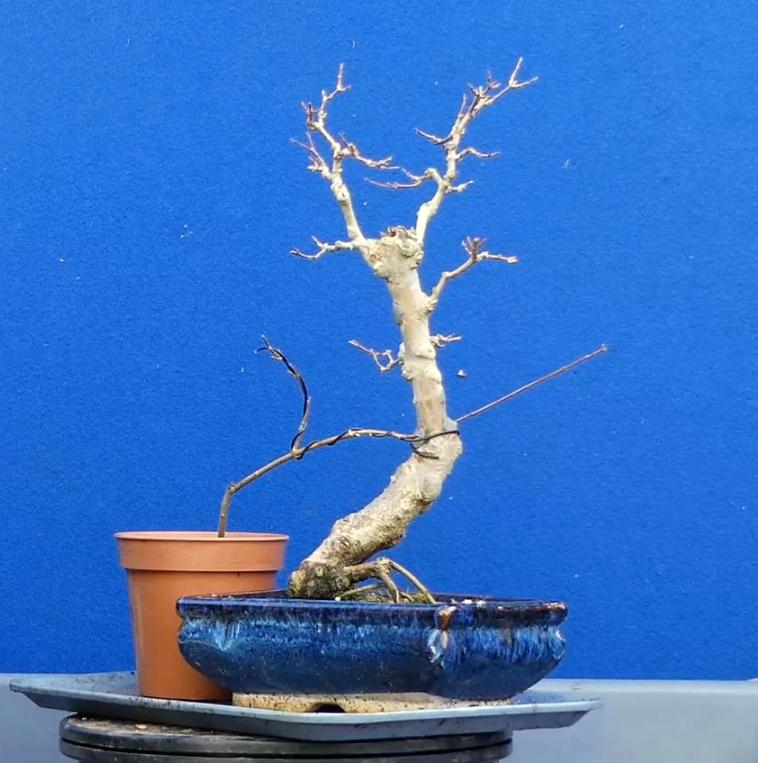
Yesterday I spent nearly 3 hours pruning one of them so I thought you might be interested in some before and after images.
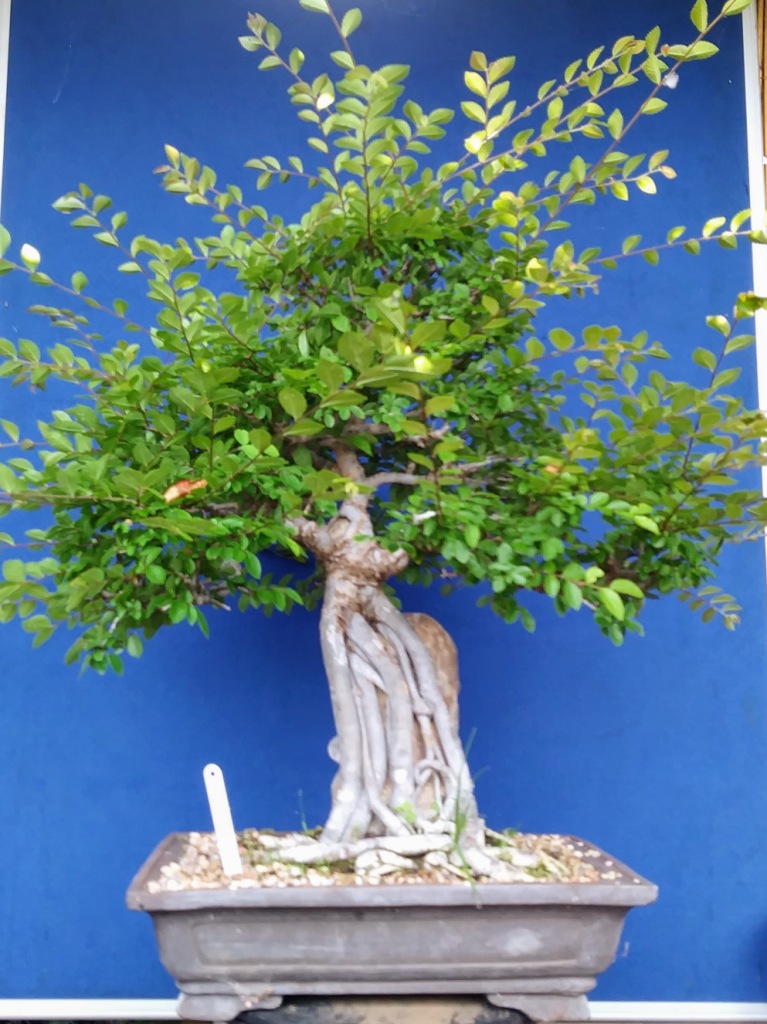
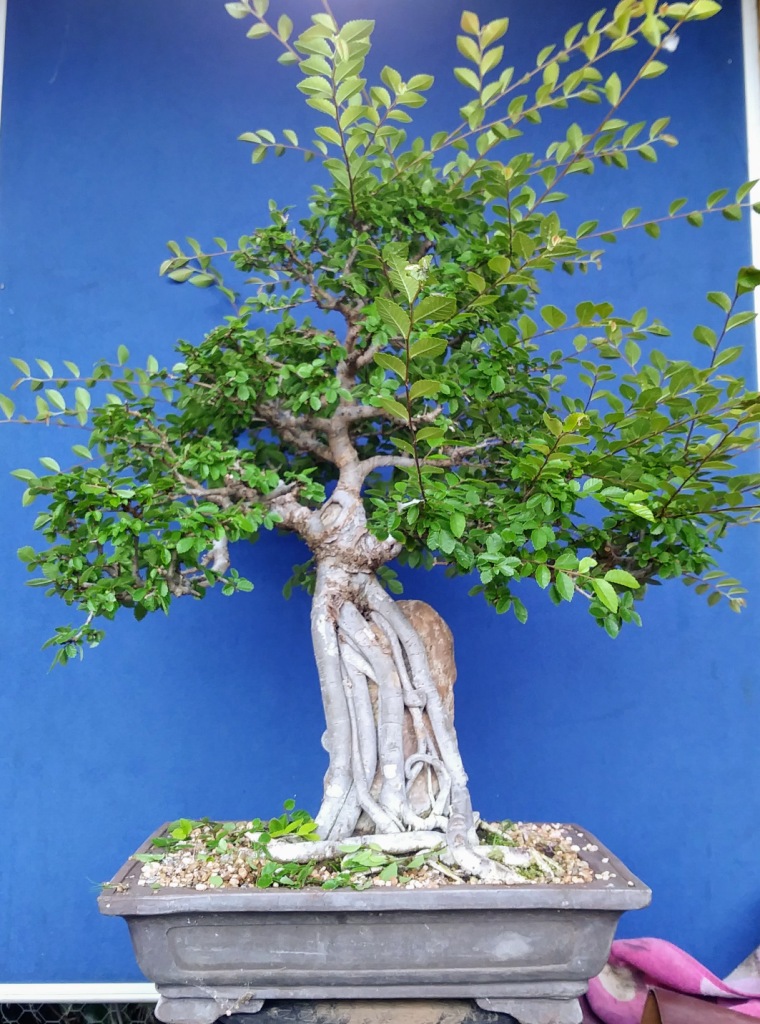
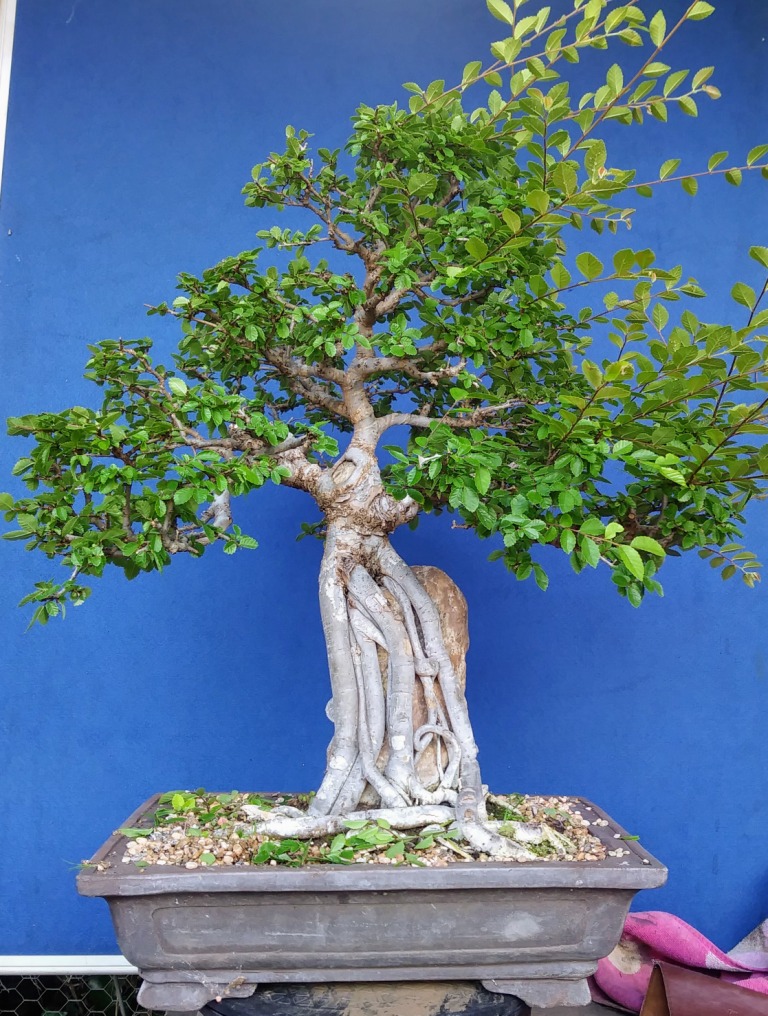
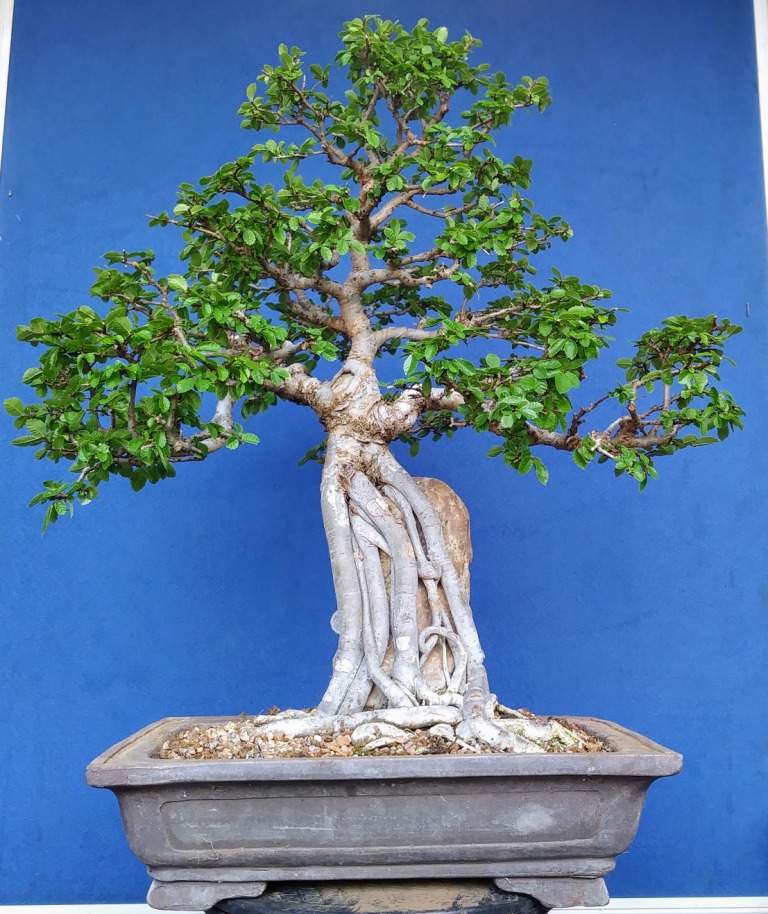
If any of your Chinese Elms are looking this way then now is a pretty safe time to prune them back to your desired shape. All of the normal pruning rules apply but just be sure to leave it in a shady place for a few weeks to allow the newly exposed leaves time to acclimatise.
Happy Bonsaing and enjoy the summer break
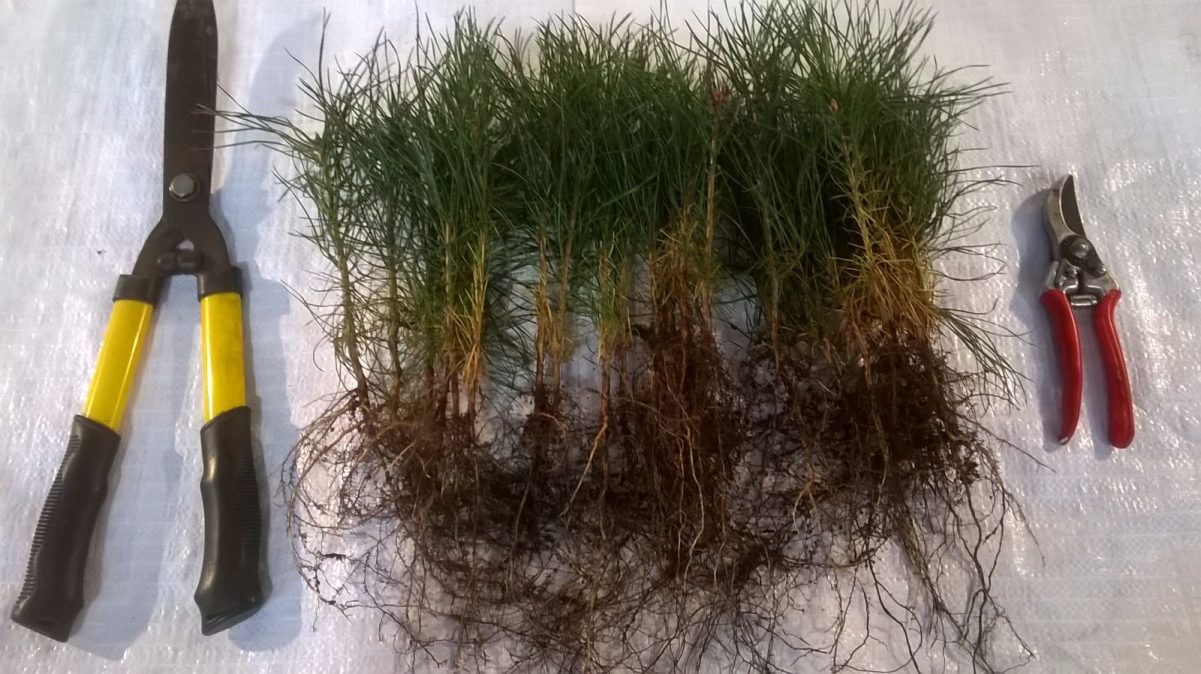
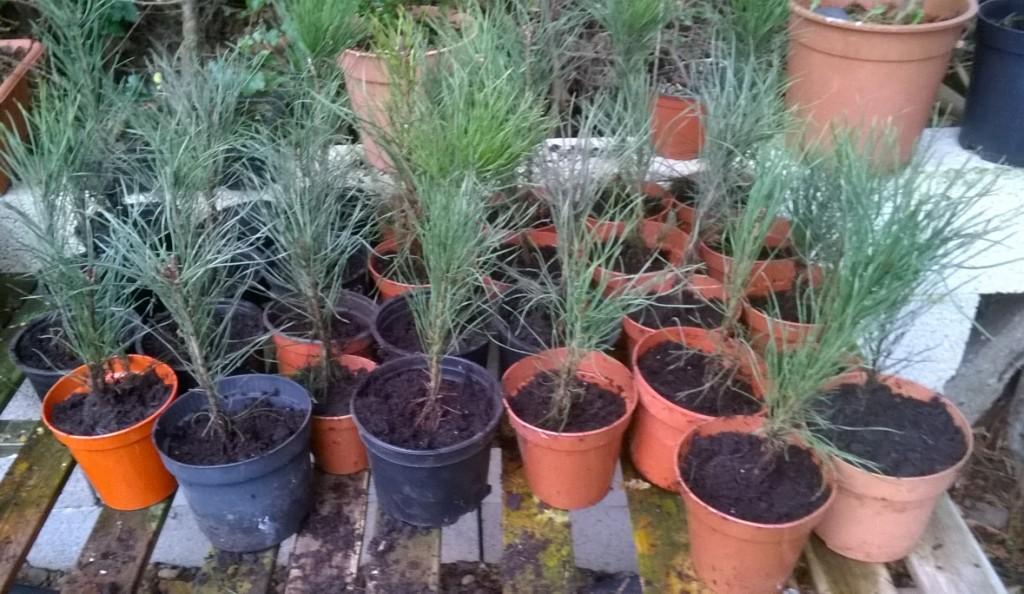
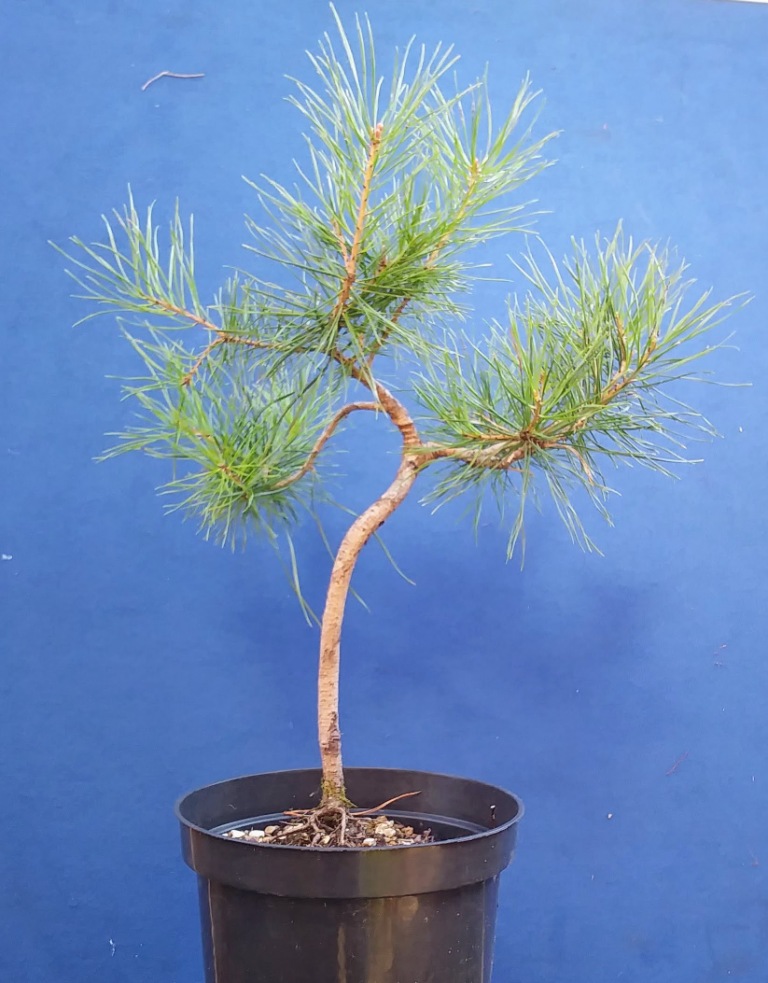
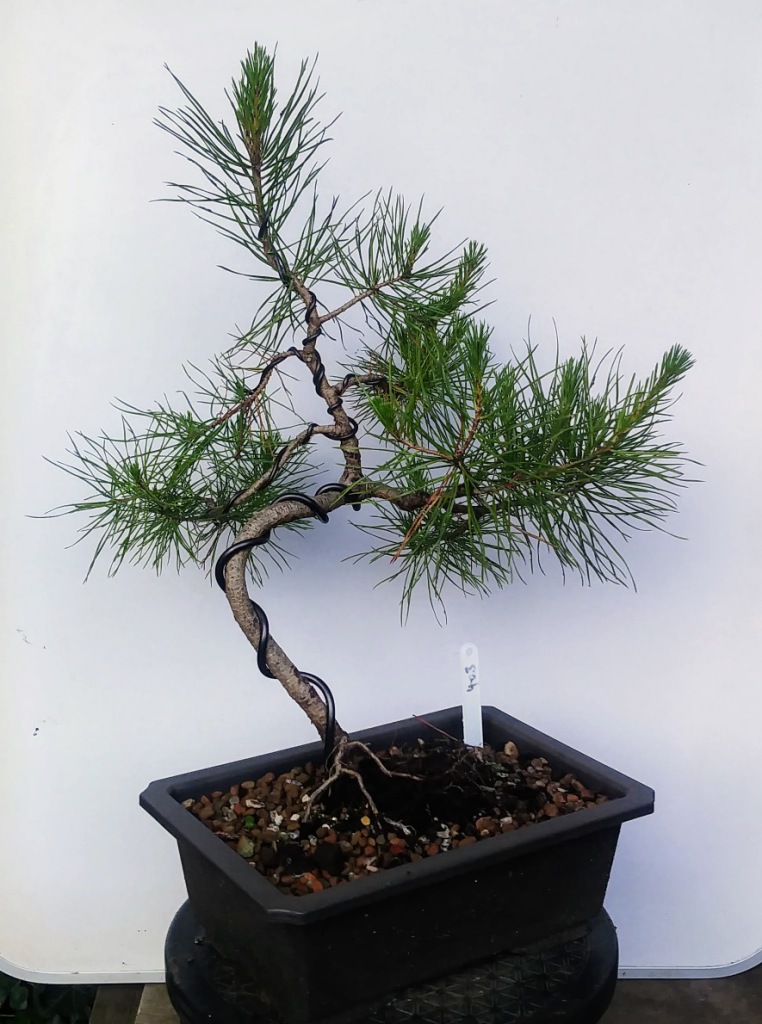
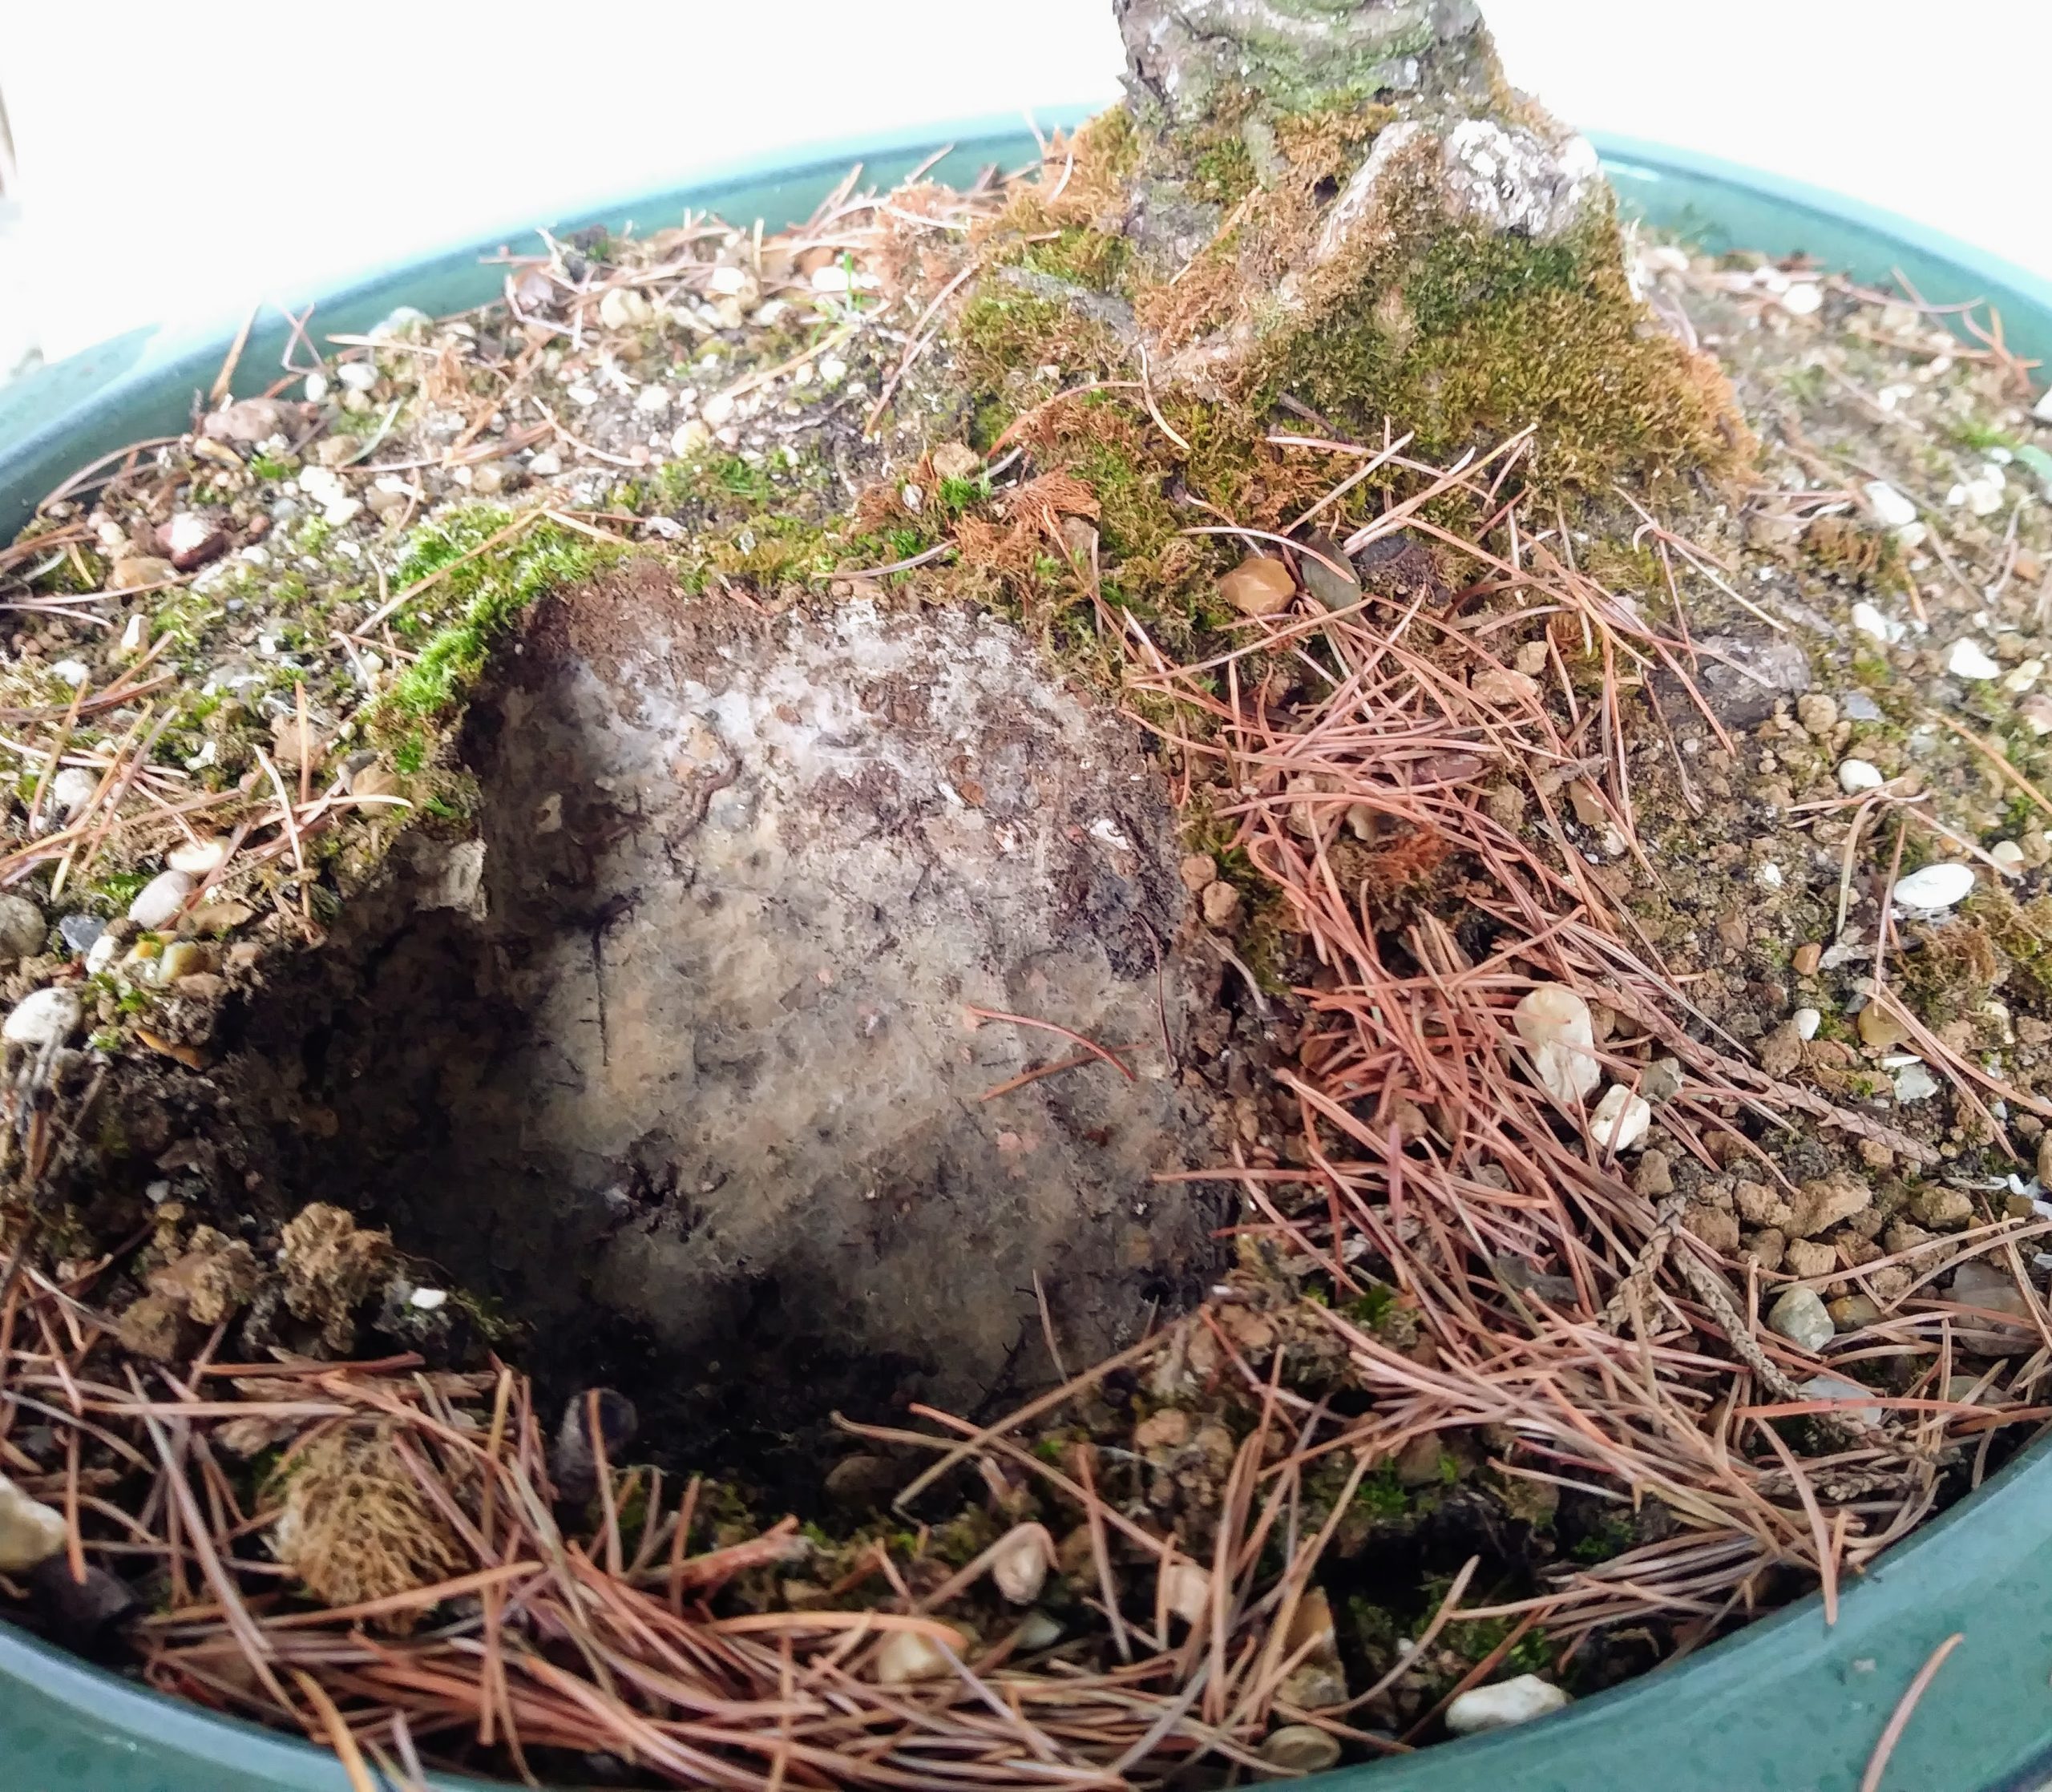
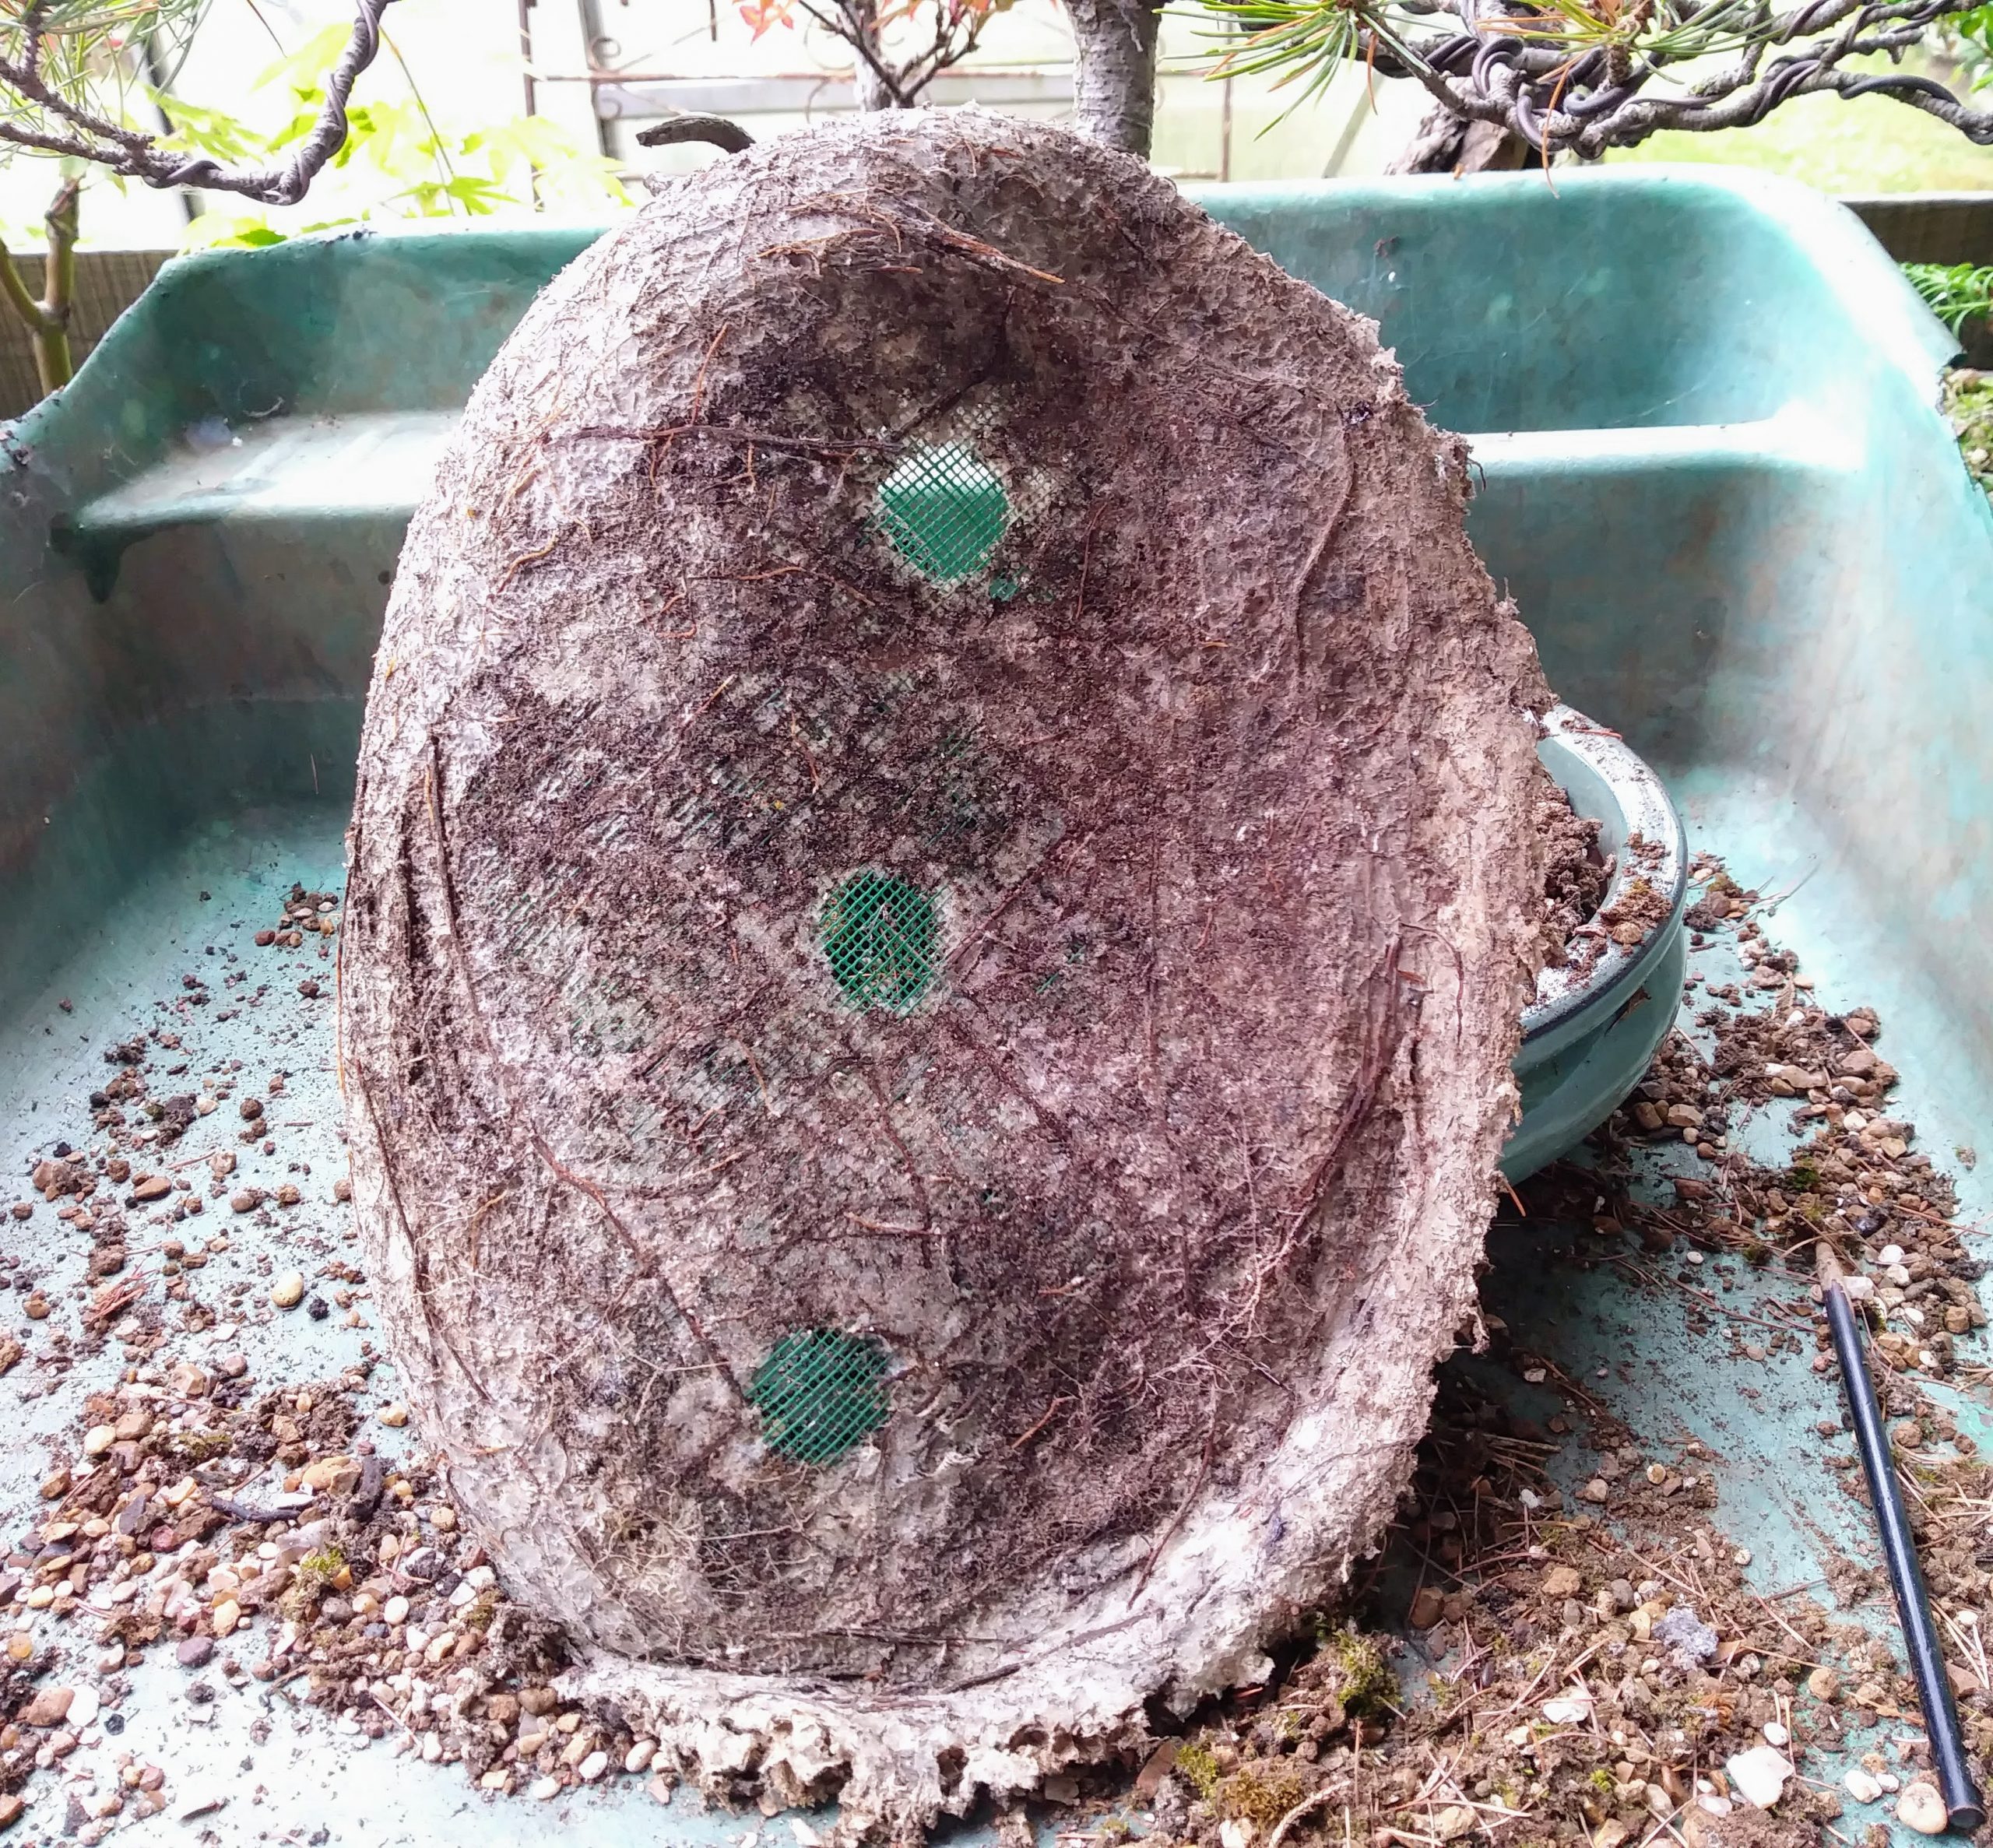
This is a classic example of ‘on the job’ learning. Looking back I wish I had understood the requirements for succesful potting of a bare rooted pine. Perhaps then, I would now be dealing with twenty thriving potensai subjects
What I also learnt was how difficult it was to identify that the young saplings were struggling for those years. Yet, if I had considered their progress, I would have identified that the majority were not producing new healthy candles – as they should AND this would have told me their was probably a root issue.
So hopefully, if you are new to pines, you will take this crucial bit of knowledge and use it wisely. Key point for pines – do not bare root them. You want to keep a good amount of that beneficial fungus from the old soil to keep the exchange of nutrients process going.

It is really worth taking the time to look back over some of his earlier videos – he is extremely clear in his explanations and visually makes it much easier to know what ‘you’ should be doing next.
It is also fun to see the various ways his hair is styled
Be ready for my shop page to appear soon(ish) – it will still be centred on ‘collections only’ but I am now able to take card payments.
Keep smiling…
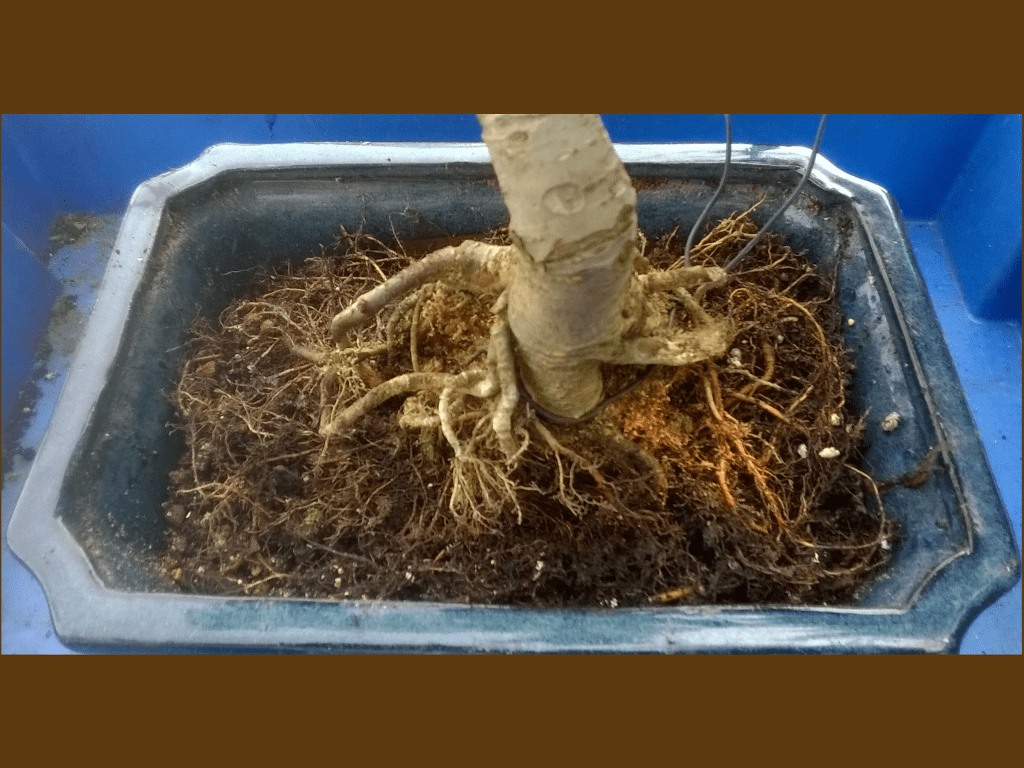
Through a series of photographs and short notes I will take you through the repot and root prune process used for one of my Chinese Elms in Spring 2018. This process is the same I would apply for any bonsai that has outgrown its container.
Step 1 – Observation of the bonsai
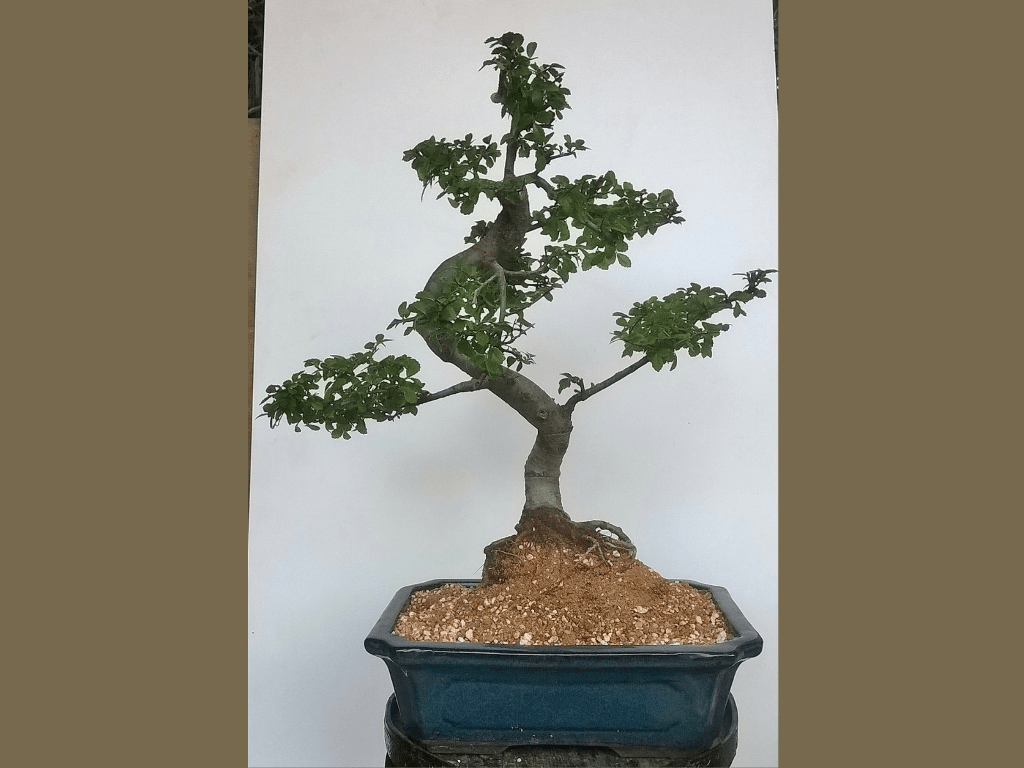
The tree is sitting very high in the pot suggesting the roots are now pushing it ‘up’ from its original placement. With Chinese Elm it is not uncommon to have to repot annually due to their rapid root growth.
I also noticed that water ran off the surface without much absorption and the lower soil was remaining dry and crumbly. This is an indication of poor percolation / soil breakdown. This reduces the ability for oxygen and water to interact with the roots.
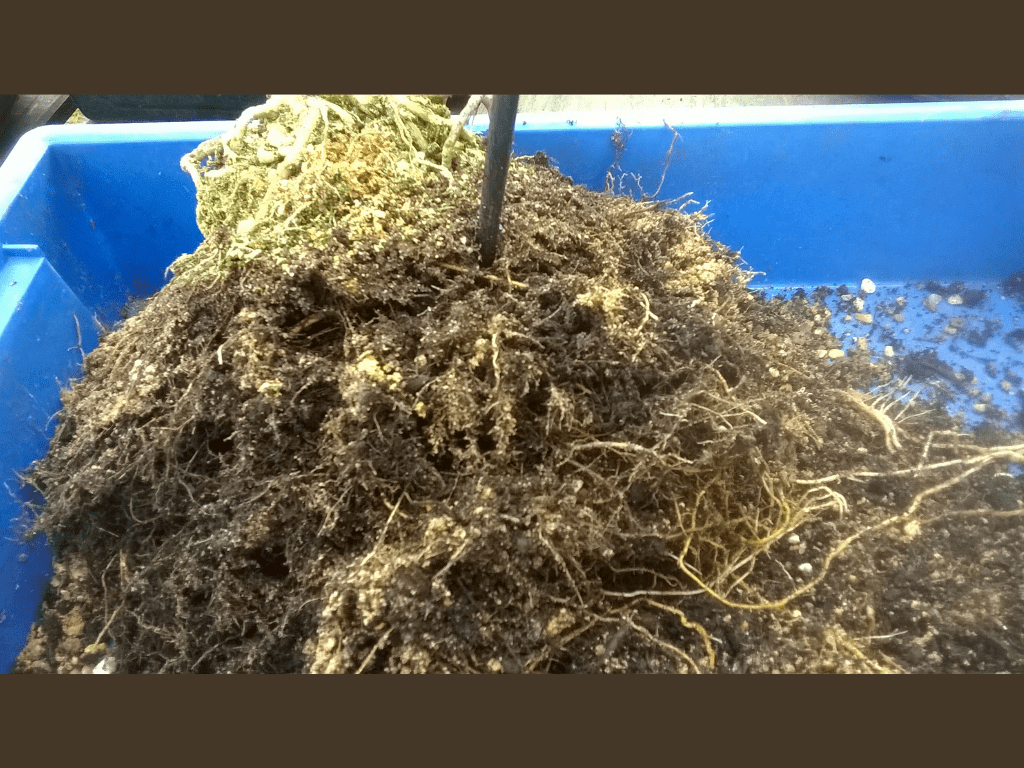
Step 2 – Exposing the rootball
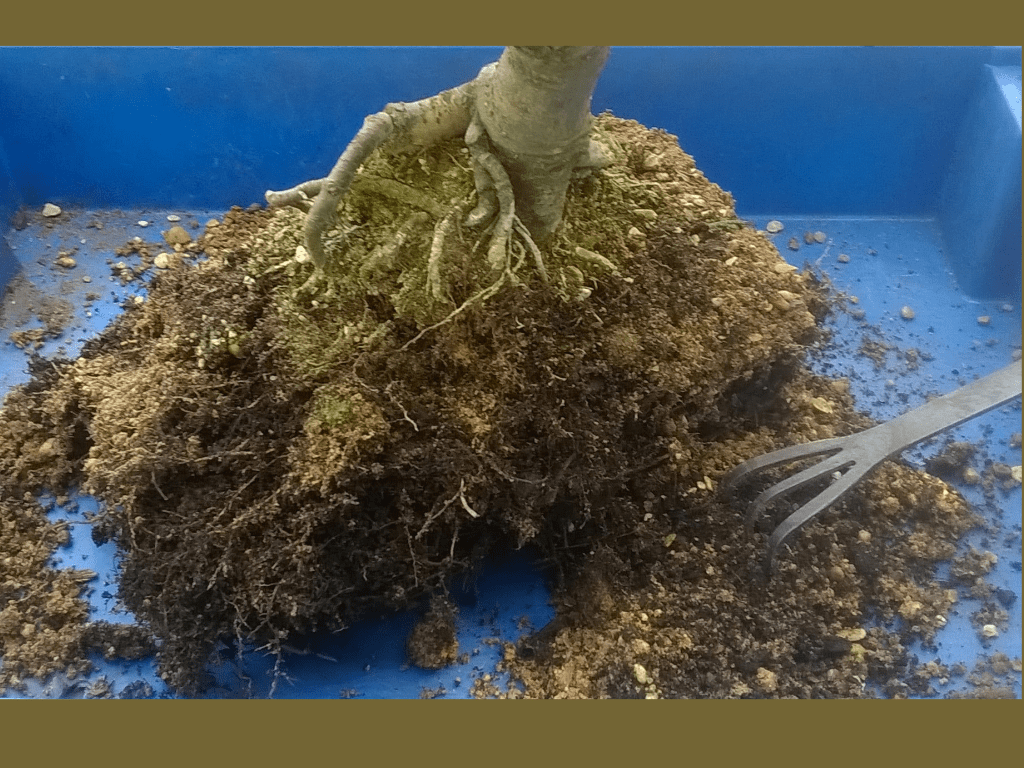
Take your time to remove the tree from the pot (don’t foget to remove the ties first!). Slowly tease away the soil mass to identify the primary rootball.
Make sure you have a spray bottle on hand to keep misting the fine roots.
Take care not to cause unecassary damage to existing roots. A chopstick is the ideal sorting tool.
Step 3 – Start sorting out the root structure
Using a chopstick I begin to remove the soil and other matter that binds the roots together. Carefully beginning the process of untangling the fibres – some will tear (do not worry)
I examine the roots for signs of disease. (They often smell or squash easily)
Watch out for any bugs or larvae that may be wriggling about – try to identify and eradicate. GET ADVICE!
Step 4 – Time to do some root pruning
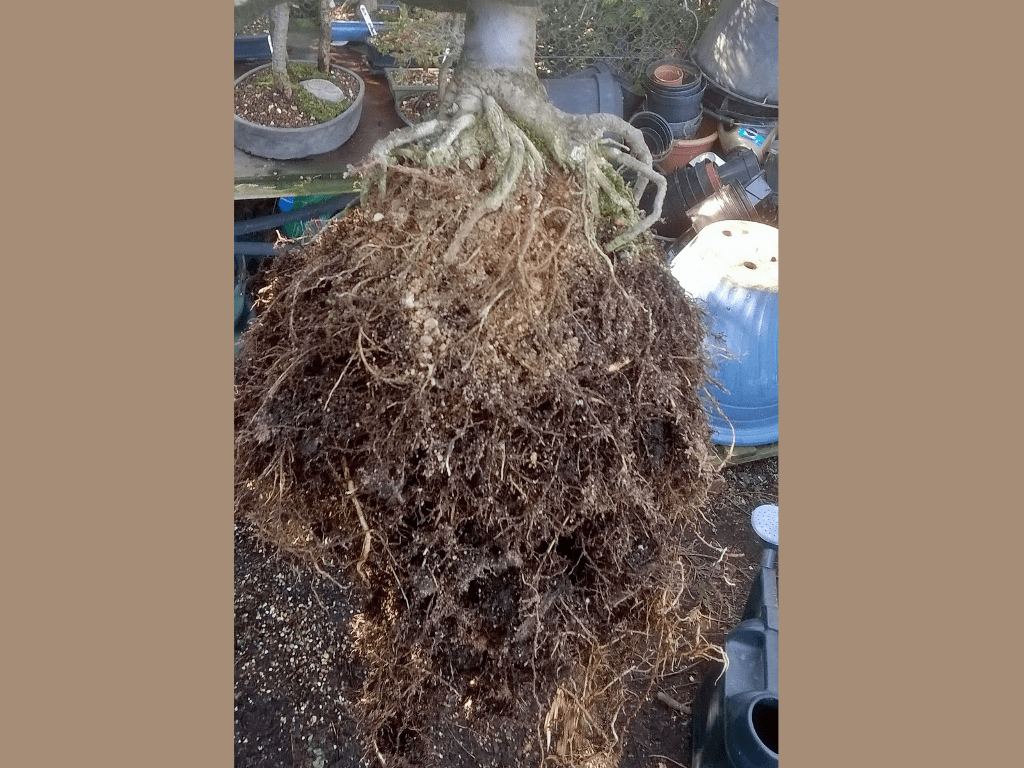
Once fully untangled it was possible to establish what I really needed in this mass of growth. I identified the core networks of roots I wanted for my tree – removing the rest!
In this case I have removed at least 1/2 of the lower root growth. New roots will emerge from the cut sites. In this way it is possible to develop a ramified system.
I have removed crossing roots and unwanted large surface roots. I keep misting the roots to keep them wet whilst I work.
Step 5 – Prepare the pot
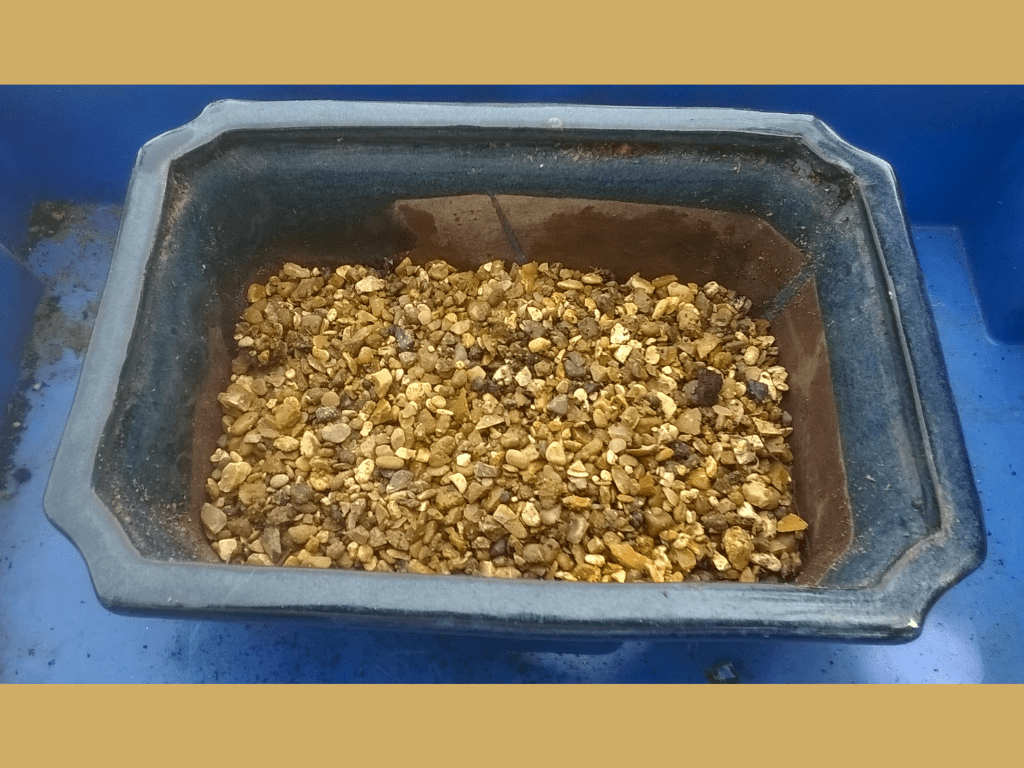
I have cleaned the old pot and checked for any winter damage. In this case it had a hairline crack so I changed it. Nothing worse than having a pot crack open in winter – risking root damage / death.
I have put a plastic mesh across the drainage holes to reduce the chance of insects getting in and grit getting out.
I then layed down a thin layer of cleaned grit as a base for the bonsai soil. This can reduce water collecting causing root rot…
Step 6 – Prepare tie wires and soil bed
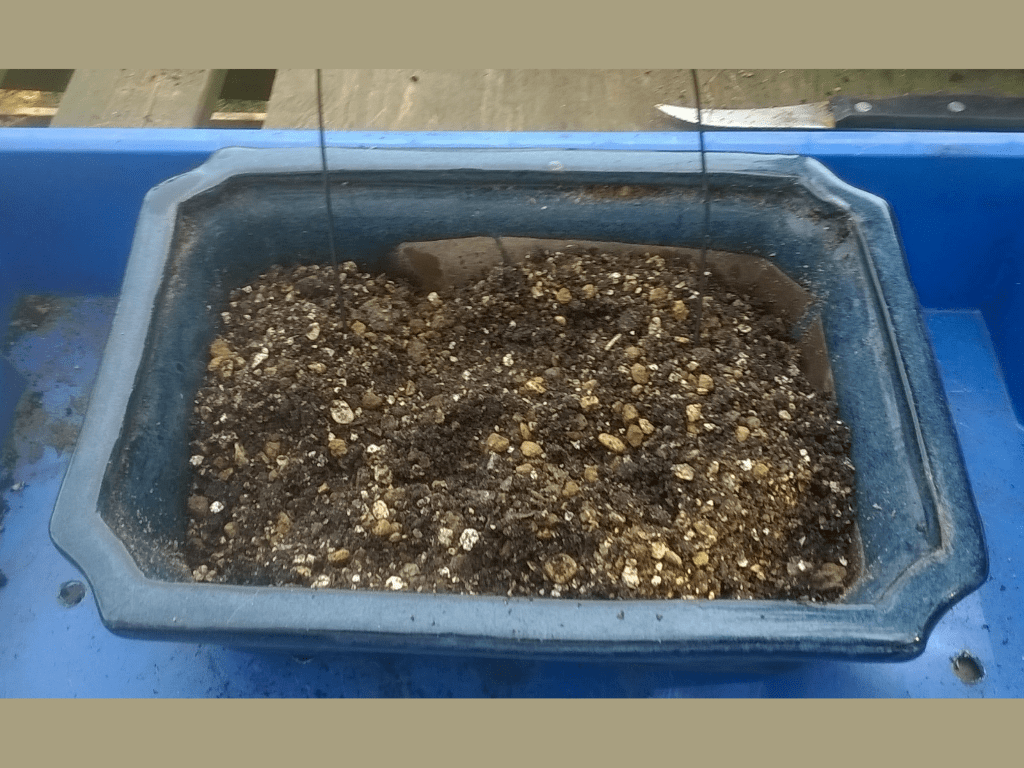
I cut two lengths of wire for anchoring ties and thread them through the drainage holes. As the elm has lots of gnarly old roots beneath the surface I will use these to hold the tree in place.
I added the bonsai soil to the level I wanted the tree to sit at and ‘mounded up’ at the position the trunk will be placed. This is the time to re-check the root and tree fits the pot. I was aiming for a good radial surface spread and wanted to allow space at the edges for more root growth.
Step 7 – Position the tree
By now you should be happy where the tree will sit. This is not a process you want to repeat unless you have to – it stresses the tree and can slow/stop growth for the year.
Secure the tree into position with the wire ensuring you avoid future damage to surface roots – wire digging in as they expand. I slide the wires beneath the lower ‘hidden’ roots or use a wooden peg system.
Step 8 – Fill the pot with soil
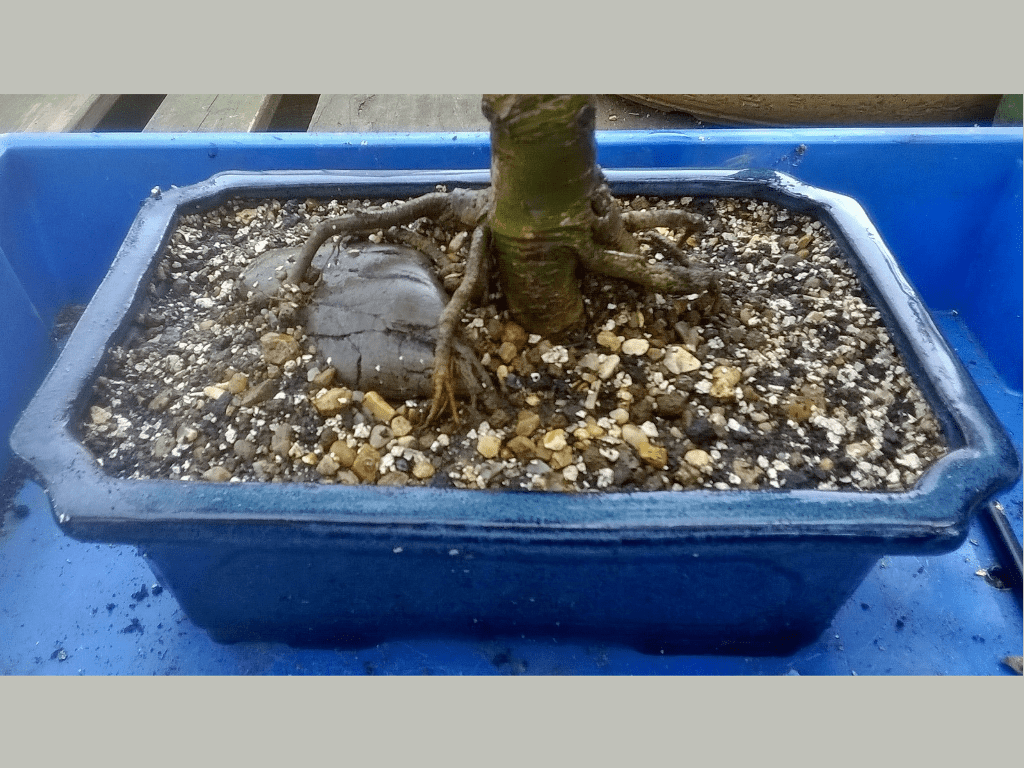
I gradually added soil to the pot whilst working it into the root network with a chopstick. Slowly trying to fill any air pockets in hard to get places.
This is the last opportunity to identify and remove any unwanted upward growing roots. So keep your clippers handy…
In this project I have added a rock and wrapped some of the roots around it to provide interest. Over the years I hope that it will become gripped by the expanding roots.
Step 9 – Water and Detail
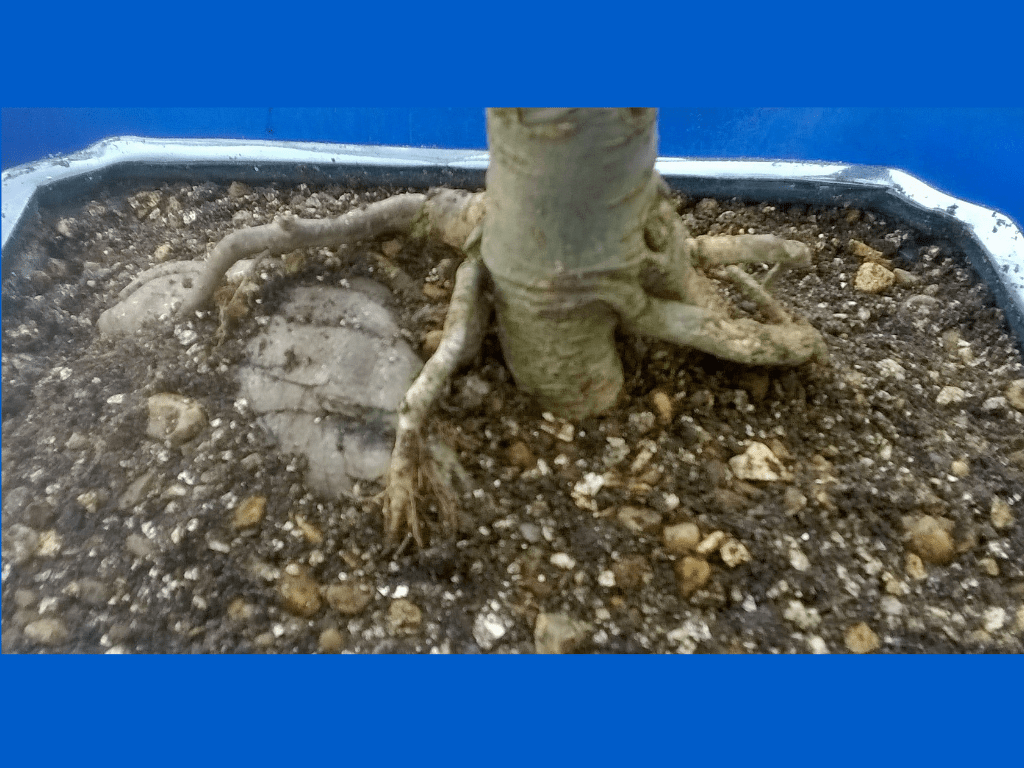
Water the tree carefully until it runs out of the bottom of the pot clear. Free draining soil avoids the risk of water collecting and risking root rot during this critical early stage.
Check for any final alterations – you can still move the tree if needed. Make certain it feels secure. You don’t want new root growth breaking due to insecure tie downs.
Brush away unwanted soil from the exposed roots and apply a moss top dressing. (See later blog post)
Step 10 – Admire your work
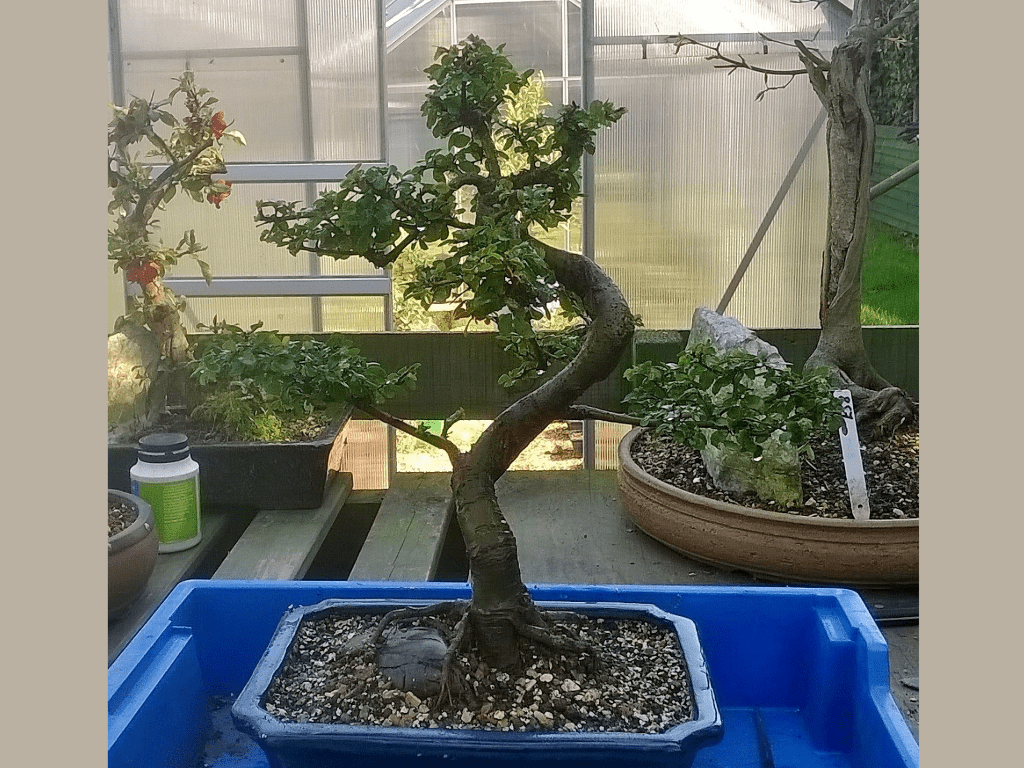
Take the time to admire what you have achieved – well done!
I make notes in my bonsai diary with a bring up date for the next ‘planned’ repot. This tree will be fine for at least 3 years but I have a review date set for 2020 (2yrs)
I will not start applying fertiliser for at least 4 weeks or until any new growth starts hardening off. As an indoor tree you can repot throughout the growing season without much risk. I avoid winter as my indoor elms go dormant.
If you wish to purchase this tree then send me a message or look in the shop section.
]]>In Part 2 of this Bonsai Collaboration I root prune and pot my four collected field-grown trees.
Watch to see just how much root growth you can remove safely. I ended up with two Smooth Leaf Elms and two European Hornbeams.
Jelle @GrowingBonsai also pops in for a few more words of wisdom…
Topics Covered today:
Cleaning and root pruning the first tree.
Why can we prune so much root?
Into a pot.
Let’s look at the Hornbeam.
Some essential advice.
What can I do with this Elm?
A root cutting perhaps?
Another tree to pot up.
A disappointing Hornbeam.
Jelle has the last word.
God Bless & Happy Bonsaiing Xavier
]]>In today’s Bonsai Basics, I will be doing my tree collecting with lots of help from Jelle of GrowingBonsai. If you have never collected before this is just what you need to watch.
This has everything from great tips, practical advice and even a few funny moments too! You definitely don’t want to skim this video…
Thanks to Hugh of Aveland Trees for allowing me on-site, especially as he thought he was going to have to do all the digging! If anybody else is interested in visiting and is near to Bourne in Lincolnshire hit the link below: https://www.avelandtrees.co.uk/
Topics Covered Include:
What tools do I need for collecting?
Three Dig Site Options.
What tree should I collect Jelle?
A visit to Aveland Trees.
Too many branches Jelle!
Where do I start digging?
Is it the same rule for all trees?
Packing the root ball.
Hardwood cuttings challenge?
A tour of Aveland Trees.
Packing the roots with sphagnum.
A few more useful tips.
Part Two of this Bonsai Basics series will be all about root pruning and potting up your collected trees
God Bless and Happy Bonsaiing,
Xavier